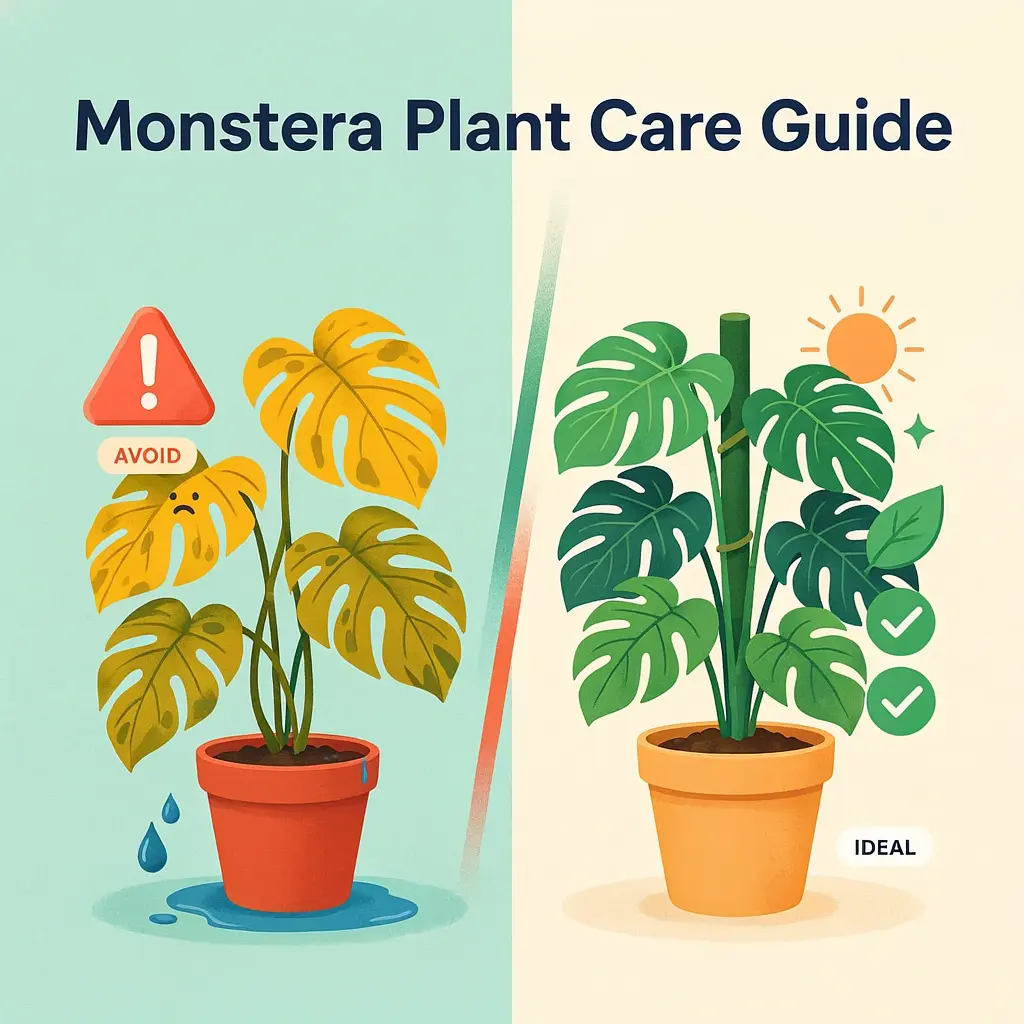
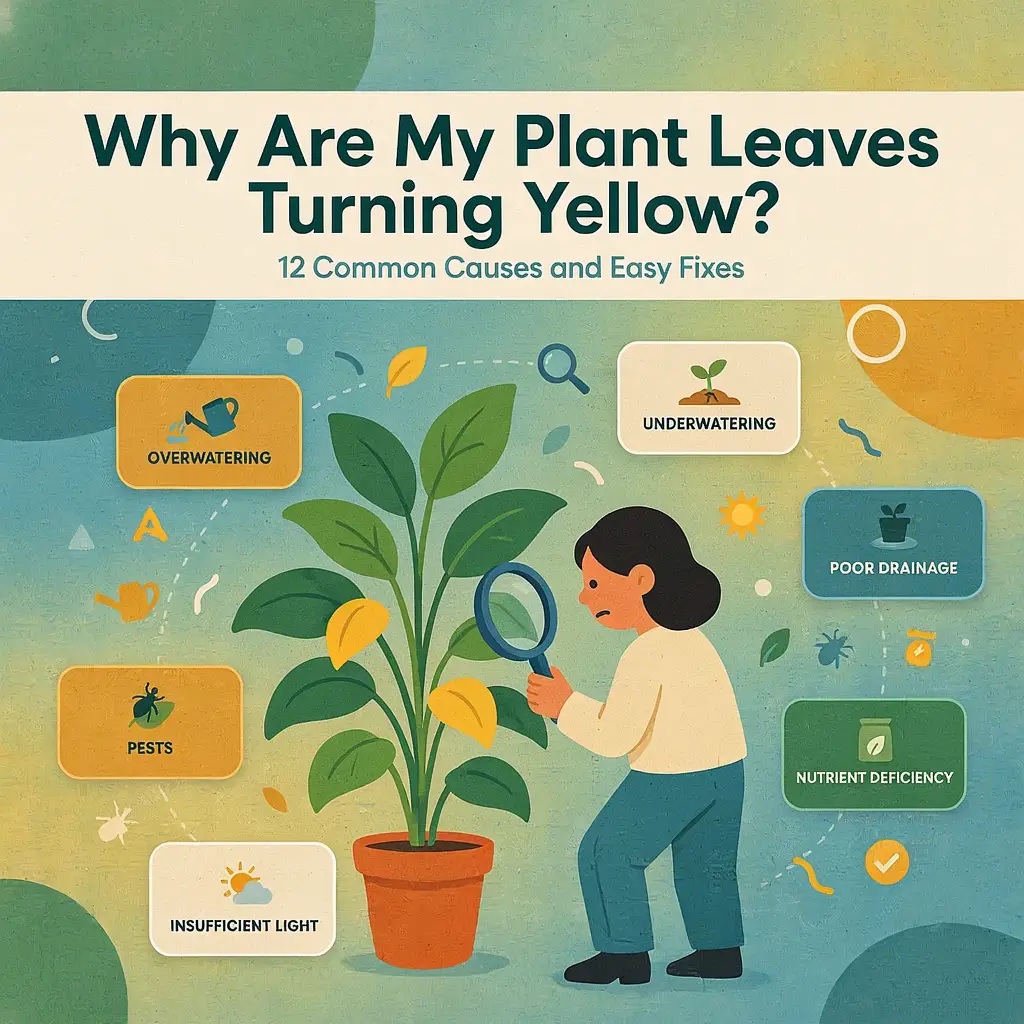
Few things are more frustrating for plant lovers than spotting a bright yellow leaf on an otherwise healthy-looking plant. Whether it's your favorite pothos, a thriving monstera, a snake plant, or even a vegetable growing in the garden, yellowing leaves can quickly spark the same question: What am I doing wrong?
The good news is that yellow leaves don't always mean your plant is dying. In fact, they're often your plant's way of communicating that something in its environment needs attention. It could be as simple as watering too often, forgetting to water altogether, placing the plant in the wrong lighting conditions, or missing an essential nutrient. Sometimes, yellow leaves are simply part of a plant's natural aging process.

The challenge is that many different problems can produce nearly identical symptoms. Treating the wrong issue can sometimes make things worse. For example, watering a plant that's already suffering from overwatering only adds to the stress, while moving a plant into brighter light won't solve a nutrient deficiency.
Learning to recognize the subtle clues your plant provides can save both time and frustration. By observing which leaves are turning yellow, how quickly the discoloration spreads, and what the soil and overall plant look like, you can usually pinpoint the underlying cause with surprising accuracy.
In this guide, we'll walk through the 12 most common reasons plant leaves turn yellow, explain how to identify each one, and share practical, beginner-friendly solutions to restore healthy green growth. Whether you're caring for indoor houseplants, balcony containers, or outdoor garden plants, you'll leave with the confidence to diagnose the problem and help your plants thrive once again.
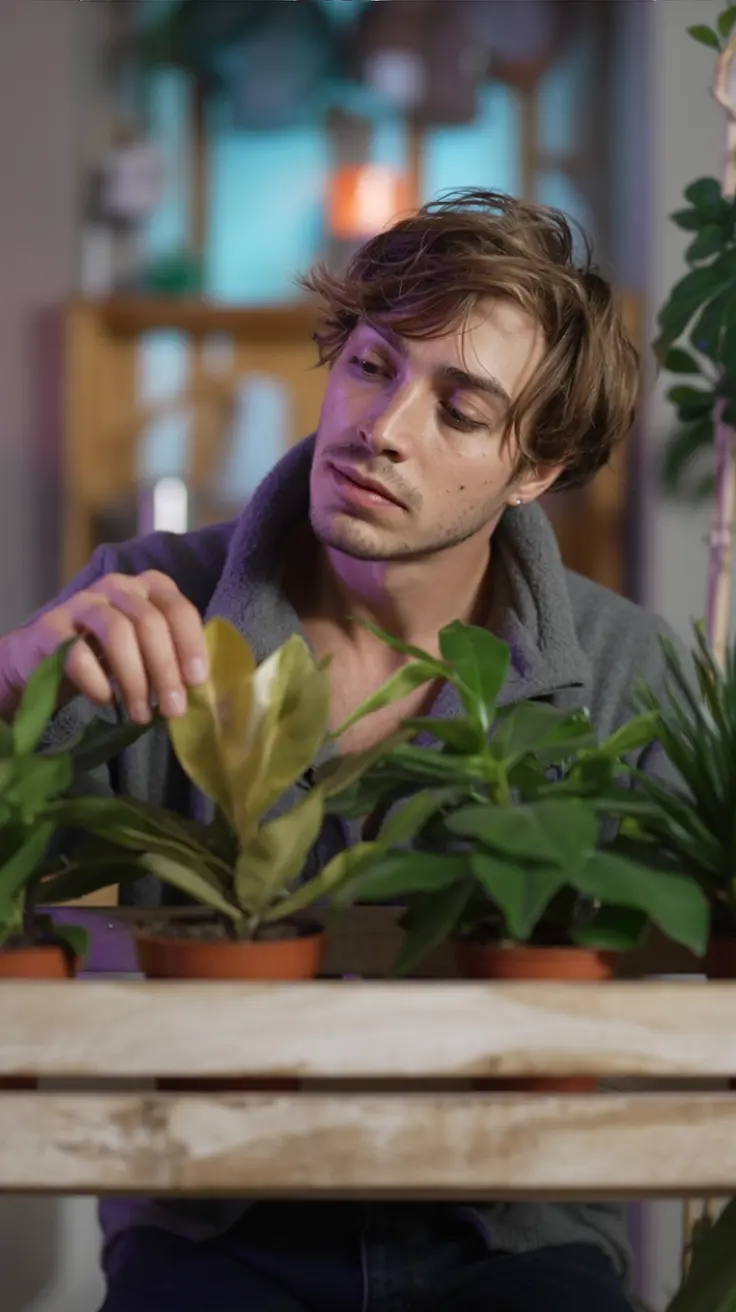
1. Overwatering (The #1 Cause)
If there is one reason responsible for more yellow leaves than any other, it's overwatering. Many plant owners assume that giving a plant more water means giving it more care, but the opposite is often true. Most houseplants prefer their soil to dry out slightly between waterings, and constantly wet soil can create serious problems below the surface.
When soil stays saturated for long periods, air pockets disappear and roots are deprived of the oxygen they need to survive. Without oxygen, roots begin to weaken and eventually rot. As the damaged roots lose their ability to absorb water and nutrients, the leaves start turning yellow, even though the soil is still wet.
Signs Your Plant Is Overwatered
Look for these common symptoms:
- Soft, limp yellow leaves instead of dry, crispy ones.
- Leaves dropping off with very little effort.
- Soil that feels wet several days after watering.
- Mushy or black stems near the base of the plant.
- A sour or musty smell coming from the potting mix.
- Slow or completely stalled growth.
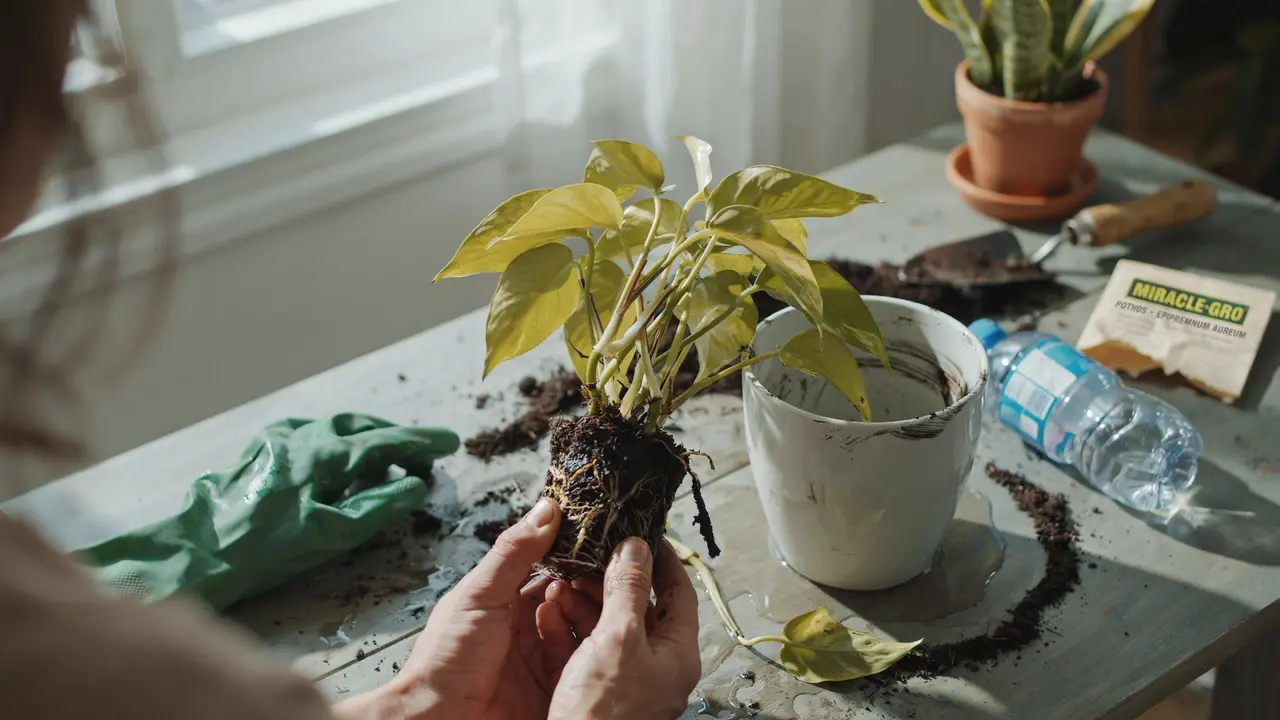
If you gently remove the plant from its pot, healthy roots should appear white or light tan and feel firm. Dark brown or black roots that feel soft or mushy are strong indicators of root rot.
How to Fix an Overwatered Plant
The sooner you act, the better the chances of recovery.
First, stop watering until the top few inches of soil have dried out. Check moisture with your finger instead of watering on a fixed schedule. Every home has different humidity, temperatures, and lighting, so plants dry out at different rates.
If the soil remains soggy for several days, remove the plant from its pot and inspect the roots. Trim away any black, mushy, or rotten roots with clean scissors before repotting into fresh, well-draining potting mix.
Make sure your container has drainage holes so excess water can escape freely. If your pot doesn't drain, even the perfect watering routine can lead to root problems.
Preventing Overwatering

A few simple habits can prevent this issue altogether:
- Water only when the top 1–2 inches of soil feel dry (or deeper for larger plants).
- Always use pots with drainage holes.
- Empty saucers after watering so roots aren't sitting in standing water.
- Use a well-draining potting mix suited to your plant.
- Reduce watering during winter, when most plants grow more slowly.
Remember, it's almost always easier for a plant to recover from being slightly too dry than from sitting in water for too long. When in doubt, wait another day and check the soil again before reaching for the watering can.
2. Underwatering
While overwatering is the most common culprit behind yellow leaves, underwatering can produce surprisingly similar symptoms. The difference is that a thirsty plant simply doesn't have enough moisture to carry water and nutrients from its roots to the rest of the plant. As a survival mechanism, it sacrifices older leaves first, causing them to yellow before eventually drying up and falling off.
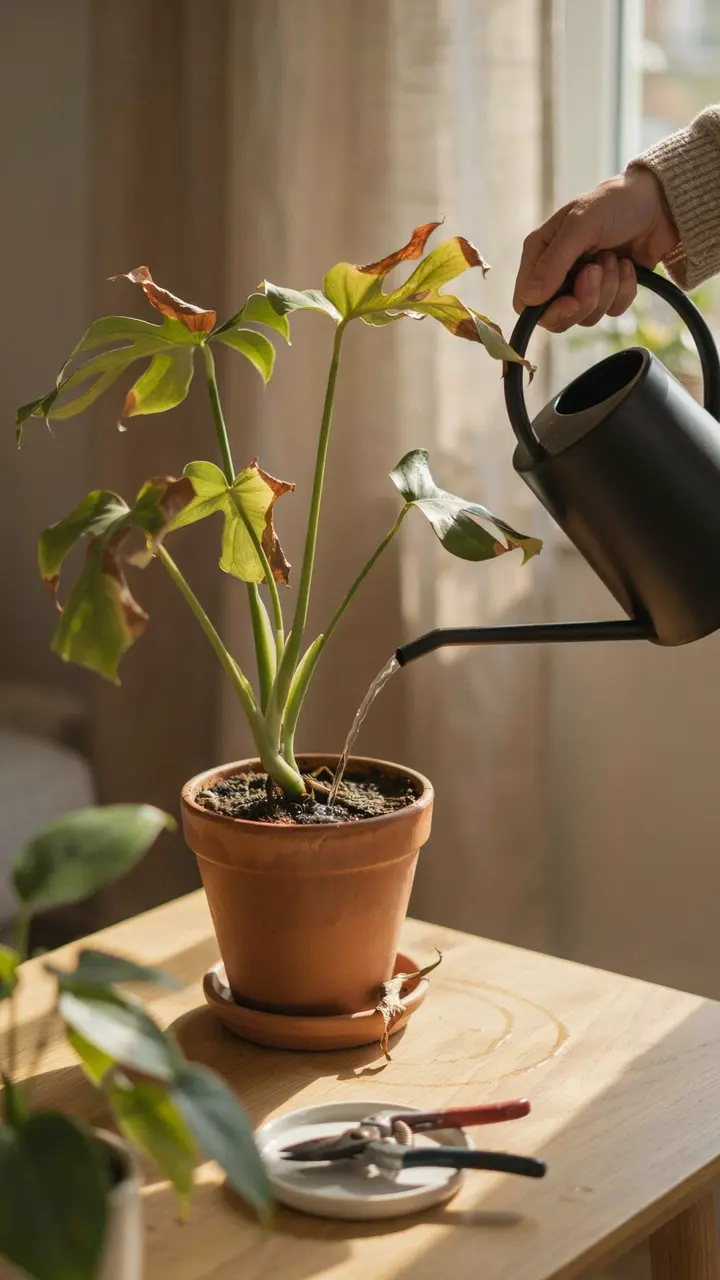
Many busy plant owners accidentally underwater by waiting too long between waterings or by giving their plants only a small splash of water. Although the surface of the soil may appear wet for a short time, the deeper roots often remain dry, leaving the plant chronically dehydrated.
Signs Your Plant Is Underwatered
Keep an eye out for these common indicators:
- Yellow leaves with dry, crispy edges.
- Brown tips or margins on the leaves.
- Wilting, drooping foliage that feels dry rather than soft.
- Soil pulling away from the edges of the pot.
- A lightweight pot that's noticeably easier to lift.
- Slow growth or smaller-than-normal new leaves.
Unlike an overwatered plant, an underwatered plant typically has dry soil throughout the pot, and the leaves often feel papery or brittle instead of soft.
How to Fix an Underwatered Plant
Start by giving the plant a thorough, deep watering. Slowly pour water over the soil until it begins draining from the bottom of the pot. This ensures the entire root ball receives moisture instead of just the surface.
If the soil has become extremely dry and compacted, water may run straight through without being absorbed. In this case, place the pot in a container of water for 20 to 30 minutes, allowing the soil to soak up moisture from the bottom. Once fully hydrated, let the excess water drain completely before returning the plant to its usual location.
Avoid the temptation to overcompensate by watering every day. Instead, return to a consistent watering routine based on the plant's needs and the moisture level of the soil.
Preventing Underwatering
A few simple habits can keep your plants properly hydrated:
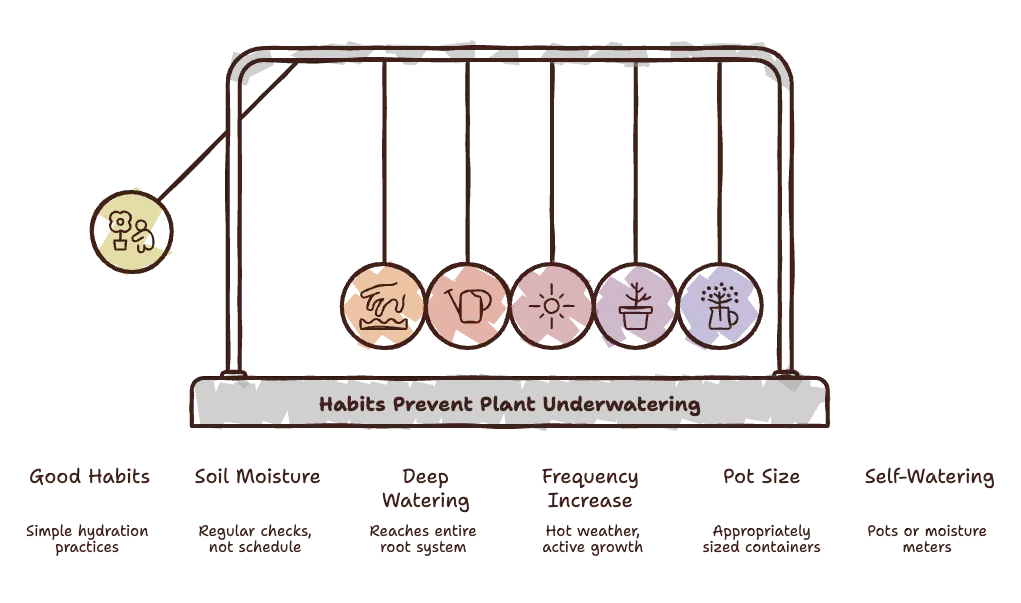
- Check soil moisture regularly instead of watering on a fixed schedule.
- Water deeply so moisture reaches the entire root system.
- Increase watering frequency during hot weather and active growing seasons.
- Choose appropriately sized pots, as very small containers dry out more quickly.
- Consider using self-watering pots or moisture meters if you frequently forget to water.
Healthy watering isn't about how often you water, it's about watering at the right time. By paying attention to your plant and the condition of its soil, you'll develop a routine that keeps leaves lush, green, and thriving all year long.
3. Too Much Direct Sunlight
Sunlight is essential for healthy plant growth, but more isn't always better. While some plants thrive in full sun, many popular houseplants, such as pothos, monsteras, peace lilies, philodendrons, and calatheas, naturally grow beneath the forest canopy, where they're protected from intense sunlight. Exposing these plants to several hours of harsh direct sun can damage their leaves and cause them to turn yellow.
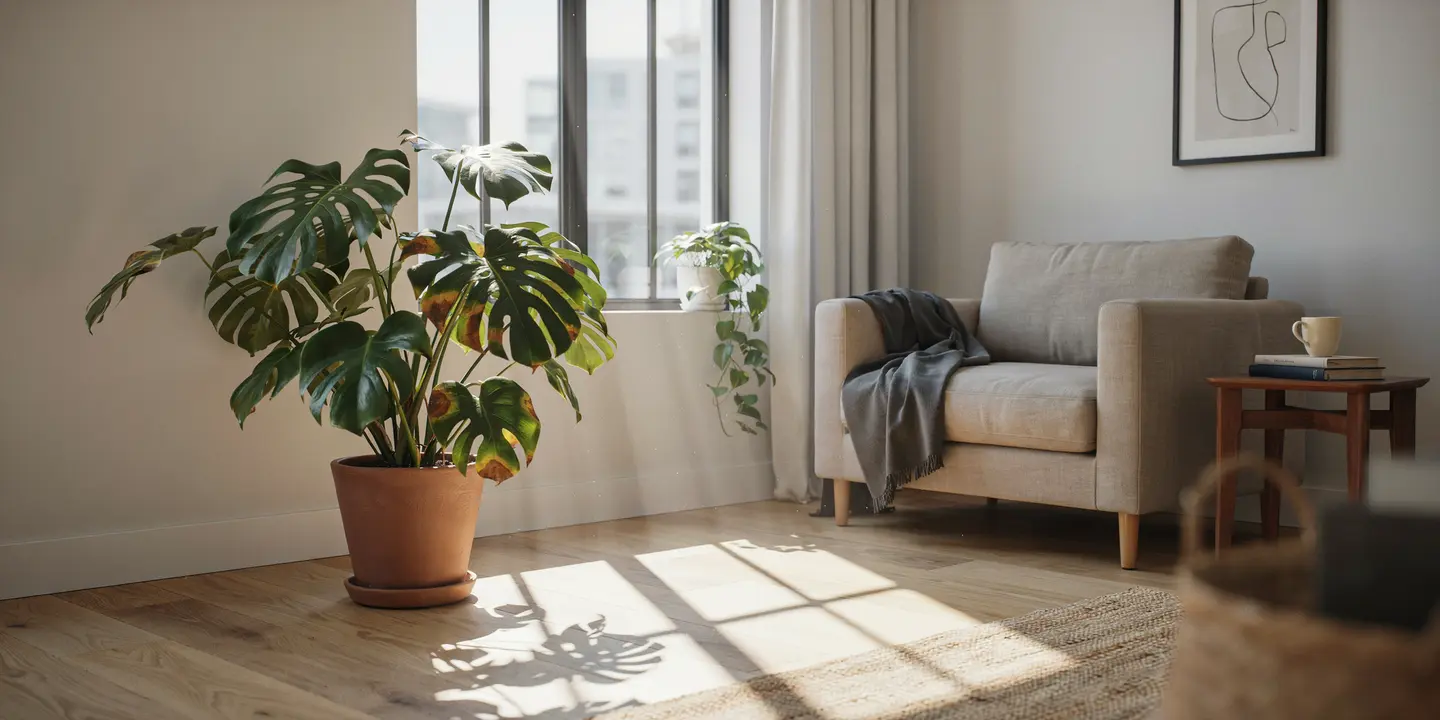
When sunlight is too intense, it overwhelms the plant's ability to photosynthesize efficiently. The chlorophyll, which gives leaves their rich green color, begins to break down, leaving behind faded yellow patches. In severe cases, the affected areas become scorched, turning brown, dry, and brittle.
Signs Your Plant Is Getting Too Much Sun
Look for these common symptoms:
- Yellow or pale patches on leaves exposed to the sun.
- Brown, crispy edges or scorch marks.
- Bleached or faded foliage.
- Leaves curling inward to reduce sun exposure.
- Damage appearing mainly on the side facing the window or strongest sunlight.
Unlike watering issues, sun damage often affects only the leaves receiving direct light, while shaded leaves remain healthy.
How to Fix Sun-Damaged Plants
The first step is to move your plant to a location with bright, indirect light. An east-facing window is often ideal because it provides gentle morning sunlight, while south- or west-facing windows may need sheer curtains to filter the stronger afternoon rays.
If you're moving an outdoor plant or relocating an indoor plant to a brighter spot, make the transition gradually. Sudden changes in light levels can shock the plant and create even more stress. Increase exposure over the course of a week or two to allow the leaves to adapt.
Leaves that have been severely scorched won't recover their original green color, but healthy new growth should appear once the lighting conditions improve. Remove badly damaged leaves only after you're confident the plant is producing new foliage.
Preventing Sunburn
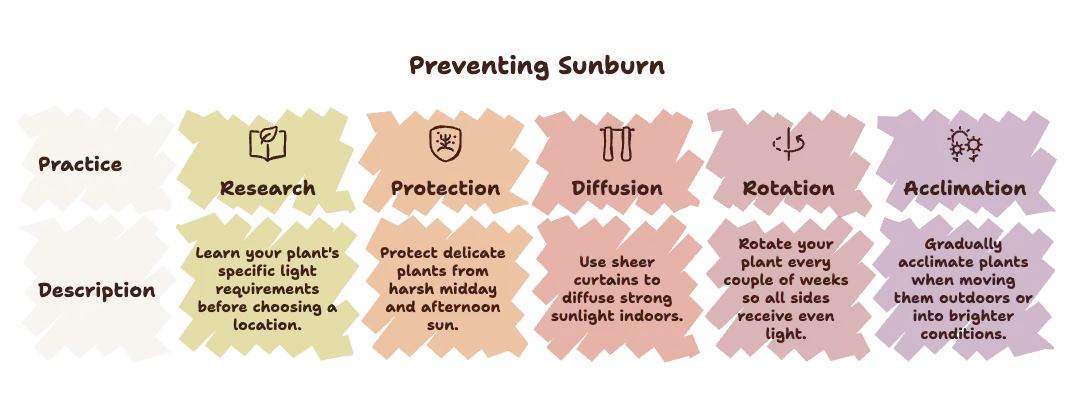
You can avoid future leaf damage by following a few simple practices:
- Learn your plant's specific light requirements before choosing a location.
- Protect delicate plants from harsh midday and afternoon sun.
- Use sheer curtains to diffuse strong sunlight indoors.
- Rotate your plant every couple of weeks so all sides receive even light.
- Gradually acclimate plants when moving them outdoors or into brighter conditions.
Remember, the goal isn't simply to provide more light, it's to provide the right kind of light. Matching your plant's natural habitat as closely as possible will encourage stronger growth, richer green leaves, and a healthier plant overall.
4. Not Enough Light
Just as too much sunlight can damage a plant, too little light can be equally problematic. Light is the fuel that powers photosynthesis, allowing plants to convert energy into healthy growth. When a plant doesn't receive enough light, it begins conserving energy by shedding older leaves, which often turn yellow before falling off.
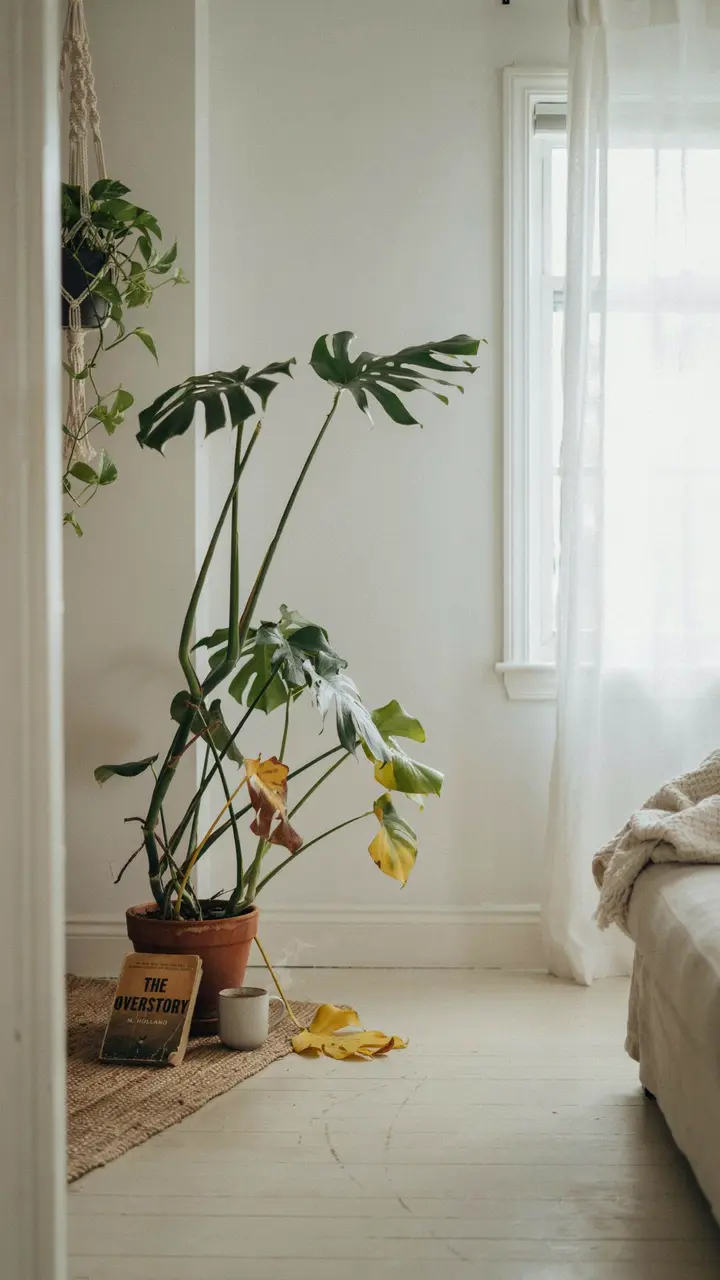
Many indoor plants can tolerate lower light conditions, but very few truly thrive in them. A plant placed in a dim corner or far from a window may survive for months while gradually showing signs of stress. Yellow leaves are often one of the first warnings that it needs a brighter environment.
Signs Your Plant Isn't Getting Enough Light
A lack of light usually causes gradual changes rather than sudden damage. Watch for these common symptoms:
- Older leaves turning yellow first.
- Slow or completely stalled growth.
- Long, thin, stretched stems reaching toward the nearest light source.
- Smaller new leaves than usual.
- Pale or faded foliage.
- Increased leaf drop over time.
If your plant appears healthy overall but continues losing older leaves while producing weak, stretched growth, insufficient light is often the cause.
How to Fix Low-Light Problems
The simplest solution is to move your plant closer to a natural light source. Bright, indirect light is ideal for most popular houseplants. Positioning a plant a few feet closer to a window can make a surprisingly large difference.
If your home doesn't receive much natural sunlight, consider using a full-spectrum LED grow light. Modern grow lights are energy-efficient and can provide the light your plants need throughout the year, especially during the shorter days of winter.
Remember to rotate your plant every week or two so each side receives equal light. This encourages balanced growth instead of leaning toward one direction.
Preventing Light-Related Stress
Keep your plants healthy by developing good lighting habits:
- Research your plant's specific light requirements.
- Place sun-loving plants near bright windows.
- Rotate pots regularly for even growth.
- Clean dusty leaves so they can absorb more light.
- Supplement with grow lights when natural light is limited.
Healthy plants don't necessarily need direct sunlight, but they do need enough light to support steady growth. By giving your plant the brightness it naturally prefers, you'll encourage stronger stems, vibrant green leaves, and healthier new growth throughout the year.
5. Nutrient Deficiencies
Even if you're watering correctly and providing the right amount of light, your plant can still develop yellow leaves if it isn't getting the nutrients it needs. Plants rely on a balanced supply of essential minerals to produce chlorophyll, build healthy roots, and support new growth. When one or more of these nutrients become unavailable, yellowing leaves are often among the first visible symptoms.
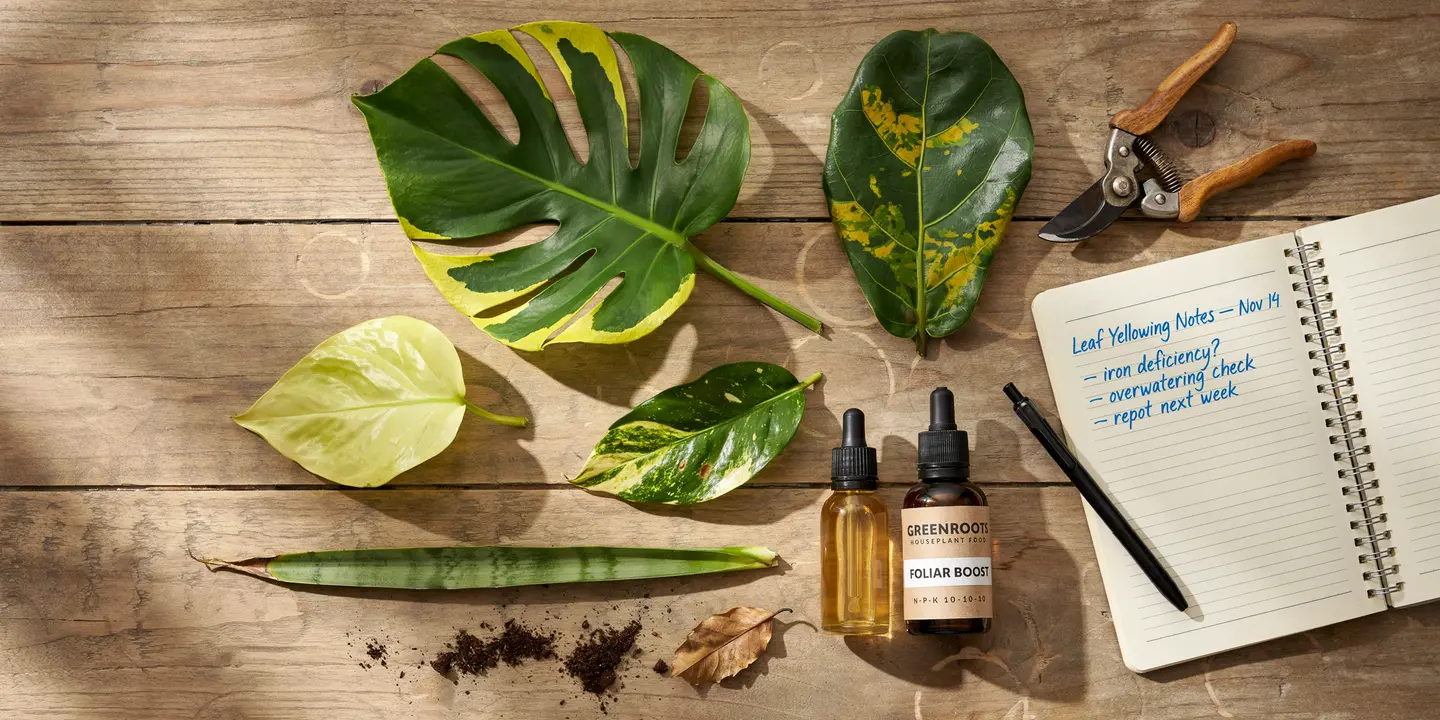
Nutrient deficiencies are especially common in houseplants that have been growing in the same pot for several years. Over time, repeated watering washes nutrients from the soil, while the plant gradually uses up what's left. Without replenishment, growth slows and leaf color begins to fade.
The key to solving the problem is identifying which nutrient is missing, as different deficiencies affect different parts of the plant.
Common Nutrient Deficiencies and Their Symptoms
Nitrogen Deficiency
Nitrogen is one of the most important nutrients for leafy growth. Because the plant can move nitrogen from older leaves to support new ones, the oldest leaves usually turn yellow first.
Signs include:
- Older leaves turning pale green, then yellow.
- Slow overall growth.
- Smaller leaves than normal.
- Thin or weak stems.
Easy Fix: Apply a balanced fertilizer or one with a slightly higher nitrogen content during the active growing season.
Magnesium Deficiency

Magnesium plays a key role in chlorophyll production. A deficiency often causes the tissue between the veins to turn yellow while the veins themselves remain green.
Signs include:
- Yellowing between leaf veins.
- Older leaves affected first.
- Green veins standing out clearly.
- Leaves may eventually develop brown spots.
Easy Fix: Use a fertilizer containing magnesium or apply Epsom salt only if a magnesium deficiency has been confirmed.
Iron Deficiency
Unlike nitrogen, iron cannot easily move throughout the plant. As a result, new growth shows symptoms before older leaves.
Signs include:
- Young leaves turning yellow.
- Bright green veins contrasting against yellow tissue.
- New growth appearing pale or almost white in severe cases.
Easy Fix: Apply an iron supplement if needed and ensure the soil's pH isn't preventing the plant from absorbing iron.
Potassium Deficiency
Potassium helps regulate water movement and overall plant health.
Signs include:
- Yellowing along leaf edges.
- Brown, scorched-looking margins.
- Weak stems.
- Poor flowering or fruit production.
Easy Fix: Feed with a fertilizer containing potassium and maintain a regular fertilizing schedule.
How to Correct Nutrient Deficiencies
Before adding more fertilizer, remember that more isn't always better. Excess fertilizer can damage roots and create additional problems. Start with a high-quality, balanced fertilizer formulated for your type of plant, and always follow the recommended application rate.
If multiple symptoms appear or the problem persists, consider testing your soil. A simple soil test can reveal nutrient imbalances and pH issues that may be preventing your plant from absorbing the nutrients already present.
Repotting into fresh, nutrient-rich potting mix can also give older houseplants a healthy reset, providing them with a fresh supply of essential minerals.
Preventing Nutrient Problems
Healthy nutrition starts with consistent plant care:
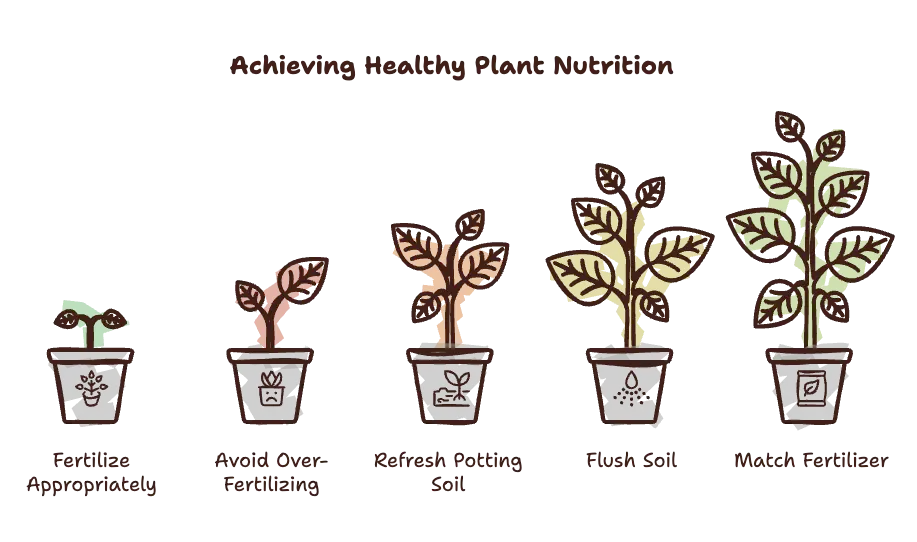
- Fertilize during the active growing season according to your plant's needs.
- Avoid over-fertilizing, which can burn roots and damage foliage.
- Refresh potting soil every one to two years for houseplants.
- Flush the soil occasionally to remove excess fertilizer salts.
- Match your fertilizer to the specific type of plant you're growing.
A well-fed plant rewards you with lush green leaves, stronger growth, and improved resistance to pests, diseases, and environmental stress. By paying attention to the pattern of yellowing leaves, you can often identify the missing nutrient and restore your plant's health before the damage becomes severe.
6. Poor Drainage
Sometimes the problem isn't how much you're watering, it's where the water goes after you water. Even if you're following a perfect watering routine, poor drainage can leave your plant sitting in constantly wet soil, creating the same conditions that lead to root rot and yellowing leaves.
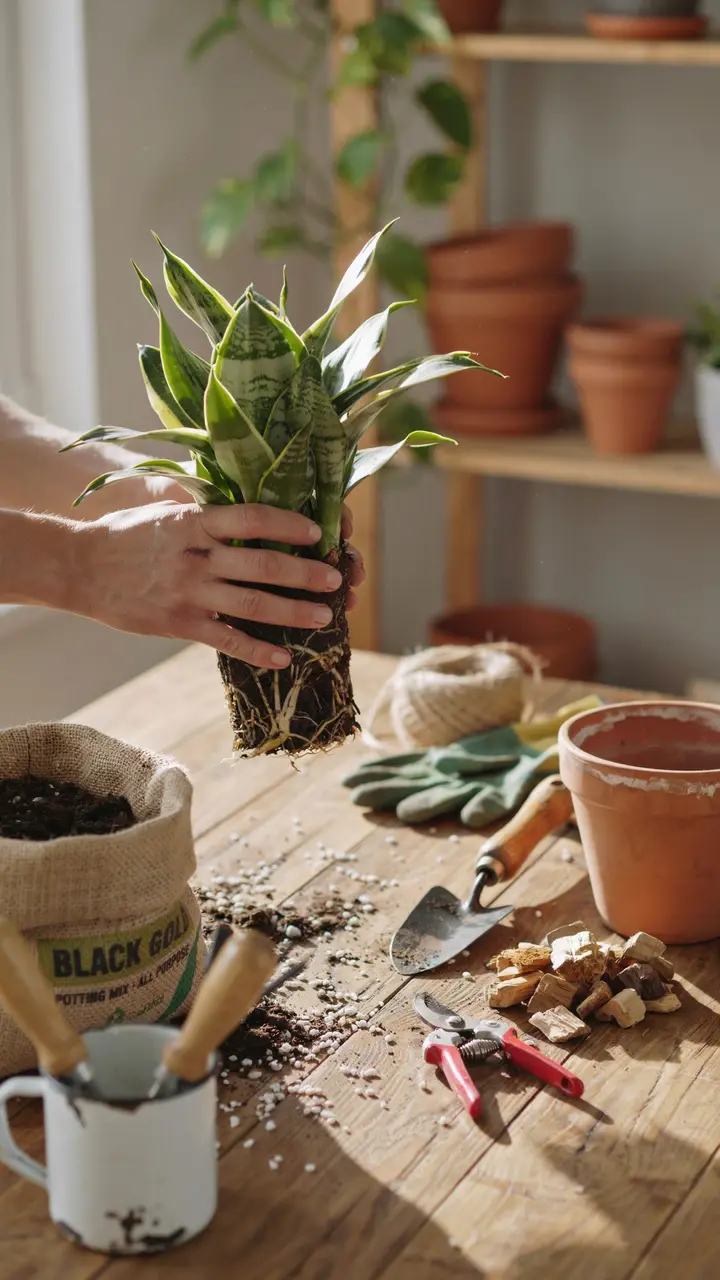
Healthy roots need a balance of water and oxygen. When excess water can't escape, the soil becomes compacted and air pockets disappear. Over time, the roots struggle to breathe, beneficial microbes decline, and harmful fungi begin to thrive. The result is a stressed plant that develops yellow leaves despite receiving what seems like the right amount of care.
Signs of Poor Drainage
Poor drainage often looks very similar to overwatering, but there are a few telltale clues:
- Soil remains wet for several days after watering.
- Water pools on the surface instead of soaking in.
- Water drains very slowly, or not at all, from the pot.
- Yellow leaves continue appearing despite watering less frequently.
- The pot feels unusually heavy for long periods.
- A musty smell develops in the soil.
- Roots appear brown, soft, or mushy when inspected.
If your plant lives in a decorative pot without drainage holes, excess water may be trapped at the bottom where you can't easily see it.
Common Causes of Poor Drainage
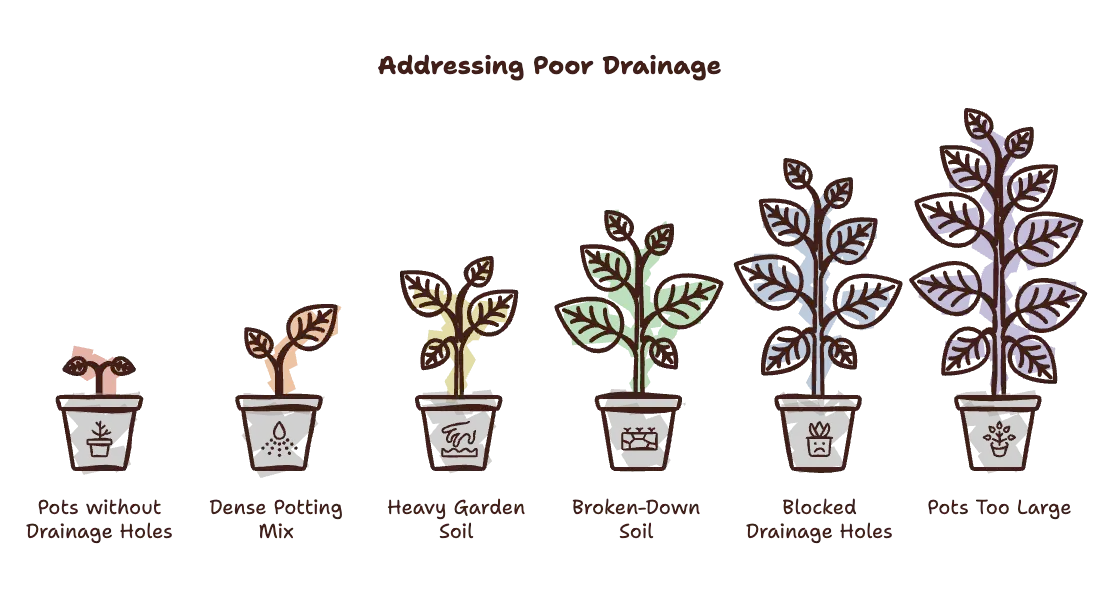
Several factors can prevent water from flowing properly through the soil:
- Pots without drainage holes.
- Dense or compacted potting mix.
- Heavy garden soil used indoors.
- Soil that has broken down over time and lost its structure.
- Drainage holes blocked by roots or debris.
- Pots that are too large, allowing excess soil to stay wet longer than needed.
Even high-quality potting soil eventually compacts as it ages, reducing airflow around the roots.
How to Improve Drainage
If poor drainage is the issue, repotting is often the best long-term solution.
Choose a container with one or more drainage holes and use a high-quality potting mix designed for your type of plant. Many indoor plants benefit from a lighter soil blend containing ingredients such as perlite, pumice, orchid bark, or coarse sand, which improve airflow and help excess water drain more efficiently.
While repotting, inspect the roots for signs of rot. Remove any damaged roots with clean pruning shears before placing the plant into fresh soil.
After watering, always allow excess water to drain completely, and empty any saucers or decorative cachepots so the plant isn't left sitting in standing water.
Preventing Drainage Problems
Good drainage begins before you even water your plant:
- Always choose pots with drainage holes.
- Use a well-draining potting mix rather than ordinary garden soil.
- Refresh old potting soil every one to two years.
- Avoid oversized containers unless the plant truly needs one.
- Check drainage holes regularly to ensure they aren't blocked.
Proper drainage is one of the simplest yet most overlooked aspects of plant care. When water can flow freely and roots have access to oxygen, your plant is far less likely to develop yellow leaves, root problems, or slow, unhealthy growth. In many cases, improving drainage alone is enough to bring a struggling plant back to life.
7. Root Bound Plants
If your plant has been living in the same pot for several years, yellow leaves may simply be a sign that it's outgrown its home. As plants mature, their roots continue expanding until they eventually fill every available space inside the container. When this happens, the plant becomes root bound, meaning the roots have little room left to grow.
A root-bound plant struggles to absorb enough water, oxygen, and nutrients because the dense network of roots leaves very little soil behind. Even if you water and fertilize regularly, the plant may still show signs of stress because the roots can't efficiently support the foliage above.
Signs Your Plant Is Root Bound

Several clues can indicate that your plant needs a larger pot:
- Roots growing out of the drainage holes.
- Roots circling tightly around the inside of the pot.
- Water draining straight through without soaking into the soil.
- Soil drying out much faster than it used to.
- Yellow leaves despite proper watering and lighting.
- Slower growth or no new growth during the growing season.
- The plant becoming top-heavy or easy to tip over.
If you gently remove the plant from its container and see a thick mass of tightly wound roots with very little visible soil, it's time to repot.
How to Repot a Root-Bound Plant
Choose a new pot that's only 1 to 2 inches (2.5 to 5 cm) larger in diameter than the current one. Jumping to a much larger container may leave too much soil around the roots, increasing the risk of overwatering.
Before placing the plant into its new pot, gently loosen the outer roots with your fingers. If the roots are tightly wrapped together, make a few shallow vertical cuts around the root ball using clean pruning shears. This encourages the roots to grow outward into the fresh soil instead of continuing to circle.
Fill the new container with fresh, well-draining potting mix and water thoroughly after repotting to help the roots settle into their new environment.
Preventing Plants from Becoming Root Bound
Regular maintenance can prevent this issue from developing:
- Check your plants every one to two years for root crowding.
- Repot fast-growing plants more frequently than slow growers.
- Replace old potting mix during repotting to restore nutrients.
- Choose pots that allow steady growth without being excessively large.
- Watch for signs of rapid drying, which often indicates crowded roots.
Repotting can feel intimidating, but it's one of the best things you can do for a mature plant. Giving the roots room to expand allows the plant to absorb water and nutrients more efficiently, leading to healthier foliage, stronger growth, and fewer yellow leaves in the future.
8. Natural Aging
Not every yellow leaf is a cause for concern. In many cases, yellowing is simply part of a plant's normal life cycle. Just as trees shed old leaves each year, many houseplants naturally discard their oldest foliage as they continue producing fresh, healthy growth.

As plants mature, they redirect energy and nutrients toward developing new leaves, stems, flowers, or fruit. Older leaves, particularly those near the bottom of the plant, eventually become less productive. The plant gradually breaks down the chlorophyll within these leaves, causing them to turn yellow before they dry up and fall away.
If the rest of the plant looks healthy, this process is completely normal and usually requires no intervention.
Signs It's Just Natural Aging
You can usually tell the difference between natural aging and a health problem by looking at the overall condition of the plant.
Common signs include:
- Only one or two older leaves turning yellow at a time.
- Yellowing occurring on the lowest leaves first.
- New growth remaining bright green and healthy.
- Strong stems and steady overall growth.
- No signs of pests, disease, or root problems.
If your plant is actively producing new leaves while occasionally shedding older ones, it's likely following its normal growth cycle.
What Should You Do?
In most cases, the best approach is simply to remove the yellow leaf once it has mostly changed color or comes away easily with a gentle tug. If it doesn't detach naturally, use clean, sterilized pruning scissors to trim it close to the stem.
Removing old leaves helps improve airflow around the plant, reduces the chance of fungal diseases, and encourages the plant to direct its energy toward new growth rather than maintaining aging foliage.
Avoid removing large numbers of healthy green leaves, as they continue producing energy through photosynthesis.
When Yellow Leaves Are Not Normal
Natural aging typically affects only a few leaves at a time. If you notice multiple leaves turning yellow simultaneously, yellowing spreading rapidly throughout the plant, or other symptoms such as wilting, brown spots, or stunted growth, there's likely another underlying issue that needs attention.
It's always worth checking your watering routine, lighting conditions, soil health, and the presence of pests before assuming the problem is simply old age.
Supporting Healthy Long-Term Growth

You can't stop leaves from aging, but you can help your plant replace them with healthy new growth by providing proper care:
- Water according to your plant's needs rather than a fixed schedule.
- Provide the appropriate amount of light for the species.
- Fertilize during the growing season.
- Repot when roots begin to outgrow the container.
- Keep leaves clean so they can photosynthesize efficiently.
Remember, a healthy plant isn't one that never loses a leaf, it's one that consistently replaces old foliage with vibrant new growth. Occasional yellow leaves are often a sign that your plant is doing exactly what nature intended.
9. Temperature Stress
Plants are surprisingly sensitive to temperature changes. While many houseplants can tolerate small fluctuations throughout the day, sudden or prolonged exposure to temperatures that are too hot or too cold can trigger stress responses, including yellowing leaves.
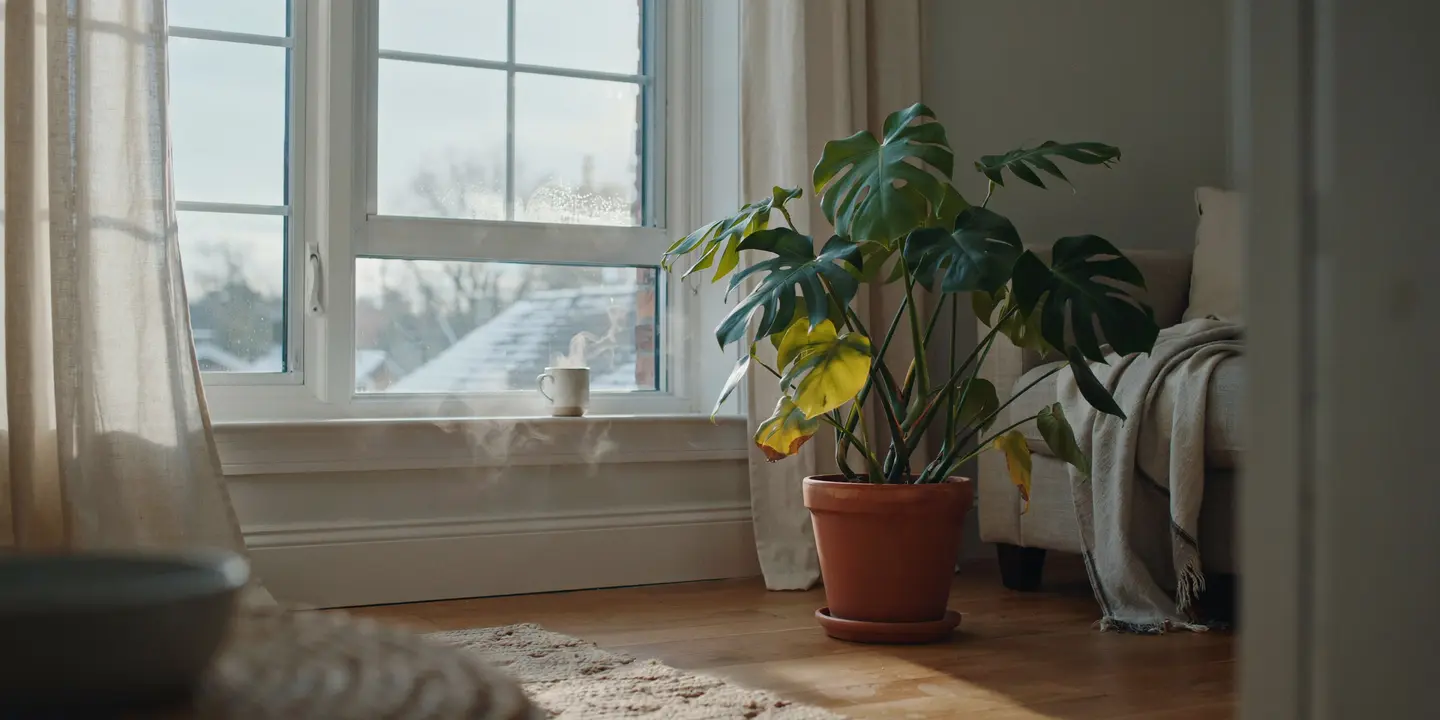
Most popular indoor plants originate from tropical or subtropical environments where temperatures remain relatively stable year-round. When they're exposed to cold drafts, heat waves, air conditioning vents, fireplaces, or radiators, their normal growth processes become disrupted. As a result, leaves may begin turning yellow, curling, or dropping prematurely.
Temperature stress often develops quickly, especially after moving a plant to a new location or during seasonal weather changes.
Signs of Temperature Stress
Look for these common symptoms:
- Sudden yellowing of otherwise healthy leaves.
- Curling or drooping foliage.
- Leaves dropping shortly after a cold snap or heat wave.
- Brown edges combined with yellow discoloration.
- Slow or halted growth.
- New leaves appearing smaller or distorted.
If the symptoms began shortly after your plant was exposed to an open window, heater, or air conditioner, temperature stress is a likely cause.
Common Sources of Temperature Stress

Many plant owners unintentionally place their plants in locations where temperatures fluctuate throughout the day.
Common problem areas include:
- Next to heating vents or radiators.
- Directly under air conditioning units.
- Near frequently opened exterior doors.
- Beside drafty windows during winter.
- In direct afternoon sun that dramatically increases leaf temperature.
- Outdoors during unexpected cold nights or heat waves.
Even a few hours of exposure to extreme temperatures can be enough to damage sensitive plants.
How to Fix Temperature Stress
Move the plant to a location where temperatures remain more consistent throughout the day. Most common houseplants grow best in temperatures between 65°F and 80°F (18°C to 27°C), although individual species may have slightly different preferences.
Keep plants away from heating and cooling vents, and avoid placing them where they receive constant drafts. If your windows become very cold during winter, move sensitive plants a short distance farther into the room during especially chilly nights.
For outdoor plants, provide temporary shade during extreme heat and consider bringing container plants indoors if unusually cold weather is expected.
Preventing Future Temperature Problems
Maintaining a stable environment is one of the easiest ways to reduce plant stress:
- Avoid placing plants near heaters, fireplaces, or air conditioners.
- Protect plants from cold drafts around windows and doors.
- Gradually acclimate plants when moving them indoors or outdoors.
- Monitor indoor temperatures during seasonal changes.
- Research the preferred temperature range for each plant species.
Plants don't just react to watering and light, they respond to their entire environment. By keeping temperatures steady and avoiding sudden extremes, you'll help your plants stay healthier, produce stronger growth, and maintain lush green foliage throughout the year.
10. Pest Infestations
Tiny insects can cause surprisingly big problems for your plants. Many common houseplant pests feed by piercing leaves and sucking out the sap, robbing the plant of water and essential nutrients. As the damage spreads, leaves often begin to turn yellow, develop spots, curl, or drop prematurely.

Because many pests are incredibly small, infestations can go unnoticed until the plant starts showing visible symptoms. Catching the problem early is the key to preventing widespread damage and keeping your plant healthy.
Common Plant Pests That Cause Yellow Leaves
Several pests are known for causing yellowing foliage.
Spider Mites
Spider mites are among the most common indoor plant pests. They're tiny, difficult to see with the naked eye, and thrive in warm, dry conditions.
Signs include:
- Tiny yellow or white speckles on leaves.
- Fine webbing on stems or leaf undersides.
- Leaves gradually turning yellow and drying out.
Aphids
Aphids gather in clusters on new growth, feeding on soft stems and leaves.
Signs include:
- Curled or distorted leaves.
- Sticky residue (honeydew) on leaves.
- Slow or stunted growth.
- Small green, black, brown, or yellow insects visible on stems.
Mealybugs
Mealybugs appear as white, cotton-like clusters tucked into leaf joints and stems.
Signs include:
- Yellowing leaves.
- Sticky surfaces.
- White fuzzy masses around the plant.
- Weak or slowed growth.
Scale Insects
Scale insects attach themselves firmly to stems and leaves, making them look like small brown bumps.
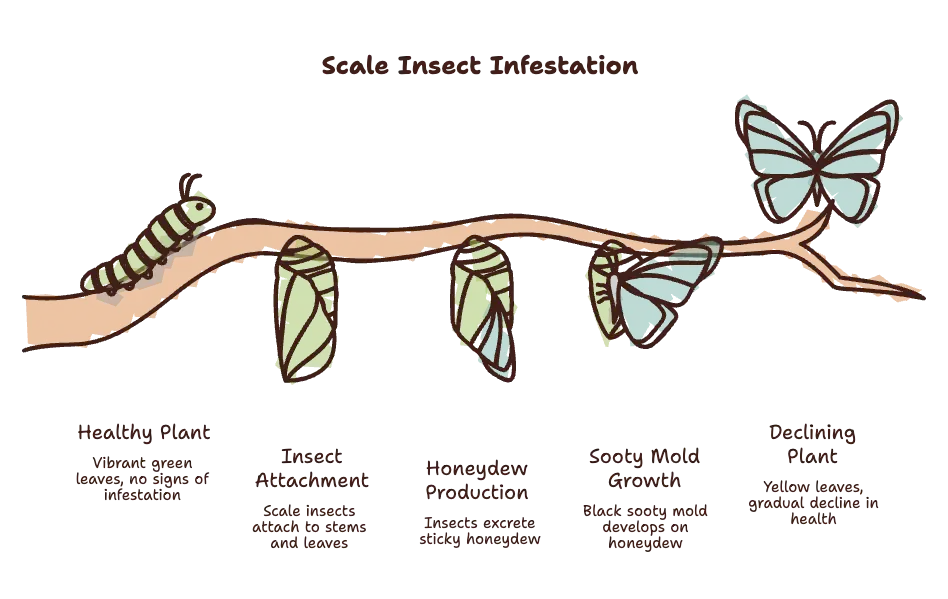
Signs include:
- Yellow leaves.
- Sticky honeydew.
- Black sooty mold developing on the sticky residue.
- Gradual decline in plant health.
Thrips
Thrips are tiny, slender insects that scrape plant tissue before feeding.
Signs include:
- Silvery streaks or patches.
- Yellow speckling.
- Distorted new growth.
- Tiny black droppings on leaves.
How to Get Rid of Plant Pests
The sooner you act, the easier pests are to eliminate.
Start by isolating the affected plant to prevent insects from spreading to nearby plants. Carefully inspect both the tops and undersides of the leaves, paying close attention to new growth and leaf joints where pests often hide.
For light infestations, gently wipe the leaves with a damp cloth or rinse the plant with lukewarm water. Heavier infestations can often be treated using insecticidal soap or neem oil, making sure to coat both sides of the leaves thoroughly. Because many pests reproduce quickly, treatments usually need to be repeated every 7 to 10 days until no signs of insects remain.
Severely damaged leaves can be pruned away to reduce the pest population and encourage healthy new growth.
Preventing Future Infestations

A few preventative habits can save you from dealing with major pest outbreaks:
- Inspect new plants before bringing them indoors.
- Quarantine new plants for one to two weeks.
- Check the undersides of leaves during regular watering.
- Keep leaves clean by gently wiping away dust.
- Maintain good airflow around your plants.
- Address pest problems as soon as they're discovered.
Healthy plants are naturally more resistant to pests, but even the strongest plants can become infested. Regular inspections and quick action are your best defense. By catching insects early, you can prevent yellow leaves from turning into a much bigger problem.
11. Fungal or Bacterial Diseases
If you've ruled out watering issues, lighting problems, nutrient deficiencies, and pests, disease may be the reason your plant's leaves are turning yellow. Fungal and bacterial infections can attack leaves, stems, and roots, disrupting the plant's ability to transport water and nutrients. As the infection spreads, yellowing often appears alongside spots, wilting, or leaf drop.
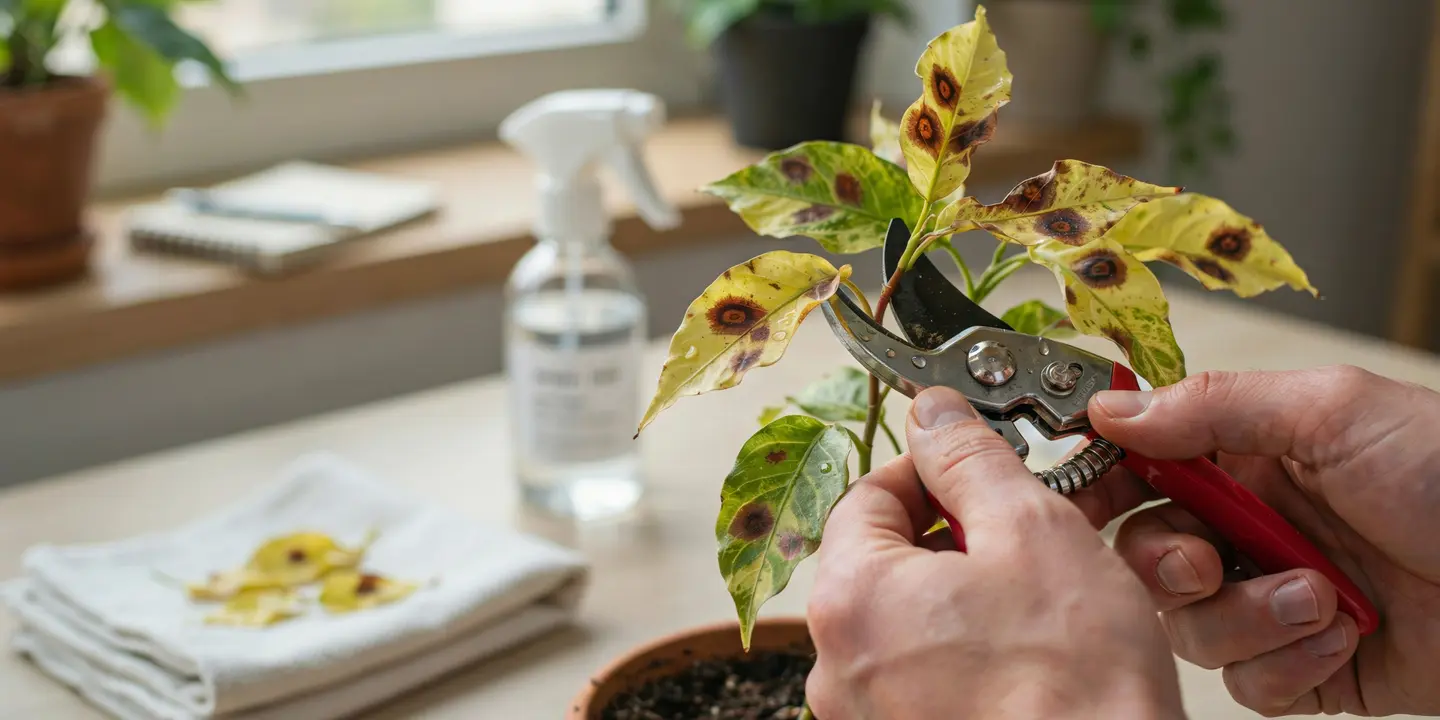
Many plant diseases thrive in warm, humid environments with poor airflow. Overwatering, overcrowded plants, and consistently wet foliage create ideal conditions for harmful fungi and bacteria to multiply.
The good news is that early detection and proper care can often stop diseases from spreading and help your plant recover.
Common Signs of Plant Diseases
Unlike simple watering problems, diseases usually produce multiple symptoms at the same time.
Look for signs such as:
- Yellow leaves with brown or black spots.
- Yellow halos surrounding dark lesions.
- Soft, water-soaked patches on leaves.
- White, gray, or black mold growing on foliage or soil.
- Leaves dropping earlier than expected.
- Wilting despite moist soil.
- Black or mushy stems near the base of the plant.
If symptoms continue spreading from leaf to leaf, a fungal or bacterial infection is likely involved.
Common Causes of Plant Diseases
Several environmental conditions encourage disease development:
- Overwatering that keeps the soil constantly wet.
- Water sitting on leaves for long periods.
- Poor air circulation around plants.
- Overcrowded indoor plant collections.
- Using contaminated pots or pruning tools.
- High humidity combined with limited airflow.
Disease organisms spread easily through splashing water, infected plant material, and unclean gardening equipment.
How to Treat Fungal and Bacterial Diseases
Start by removing all infected leaves using clean, sterilized pruning shears. Be sure to disinfect your tools after each cut to avoid spreading the disease to healthy parts of the plant.
Improve airflow by spacing plants farther apart and avoiding overcrowded shelves or windowsills. Whenever possible, water the soil directly instead of wetting the leaves, especially during the evening when moisture takes longer to evaporate.
If the infection continues spreading, consider applying a fungicide labeled for ornamental or indoor plants. Always follow the manufacturer's instructions carefully. Unfortunately, bacterial infections are more difficult to treat than fungal diseases, and severely infected plants may need to be discarded to protect nearby plants.
Preventing Plant Diseases

Prevention is far easier than treatment. Develop these healthy habits to reduce the risk of infection:
- Water only when necessary and avoid keeping soil constantly saturated.
- Allow good airflow around each plant.
- Remove dead or fallen leaves promptly.
- Clean pruning tools before and after use.
- Avoid splashing water onto foliage whenever possible.
- Inspect plants regularly for early signs of disease.
Healthy plants can usually withstand minor environmental stress, but prolonged poor conditions make them much more vulnerable to disease. By providing proper watering, good ventilation, and routine maintenance, you'll dramatically reduce the chances of fungal or bacterial infections taking hold.
12. Water Quality Problems
Most plant owners focus on how much they water, but few consider what they're watering with. The quality of your water can have a significant impact on plant health. While many plants tolerate ordinary tap water without issue, others are more sensitive to minerals, salts, chlorine, fluoride, and other chemicals commonly found in municipal water supplies.

Over time, these substances can accumulate in the soil, making it more difficult for roots to absorb the water and nutrients they need. As nutrient uptake becomes restricted, leaves may begin turning yellow, often accompanied by brown tips or edges.
Signs Water Quality May Be the Problem
Water quality issues tend to develop gradually rather than overnight.
Common symptoms include:
- Yellow leaves with crispy brown tips.
- White or chalky deposits on the soil surface or around the pot.
- Mineral buildup on the outside of clay pots.
- Slower growth despite proper watering and fertilizing.
- Leaf edges browning before the entire leaf yellows.
- Sensitive plants declining while hardier plants remain unaffected.
Plants such as spider plants, peace lilies, dracaenas, calatheas, and prayer plants are often more sensitive to chemicals and mineral buildup than many other houseplants.
Common Water Quality Issues
Several factors can contribute to yellowing leaves:
Chlorine and Chloramine: Added to municipal water supplies to make drinking water safe, these chemicals may stress sensitive plants over time.
Fluoride: Some houseplants, particularly dracaenas and spider plants, can develop brown tips and yellowing when exposed to elevated fluoride levels.
Hard Water: Water with high concentrations of calcium and magnesium leaves mineral deposits in the soil, potentially interfering with nutrient absorption.
Salt Buildup: Frequent fertilizing combined with hard water can cause excess salts to accumulate around the roots, leading to leaf discoloration and root stress.
How to Improve Water Quality for Your Plants
If you suspect water quality is contributing to yellow leaves, there are several simple solutions.
Using filtered water is one of the easiest ways to reduce chlorine, fluoride, and excess minerals. Rainwater is another excellent option because it's naturally soft and free of many chemicals found in treated tap water.
If filtered or rainwater isn't available, allowing tap water to sit uncovered for 24 hours may help some chlorine dissipate, although this method does not remove chloramine or dissolved minerals.
Every few months, thoroughly flush the soil by slowly watering until a generous amount drains from the bottom of the pot. This helps wash away excess fertilizer salts and mineral buildup that may be accumulating around the roots.
Preventing Water Quality Problems
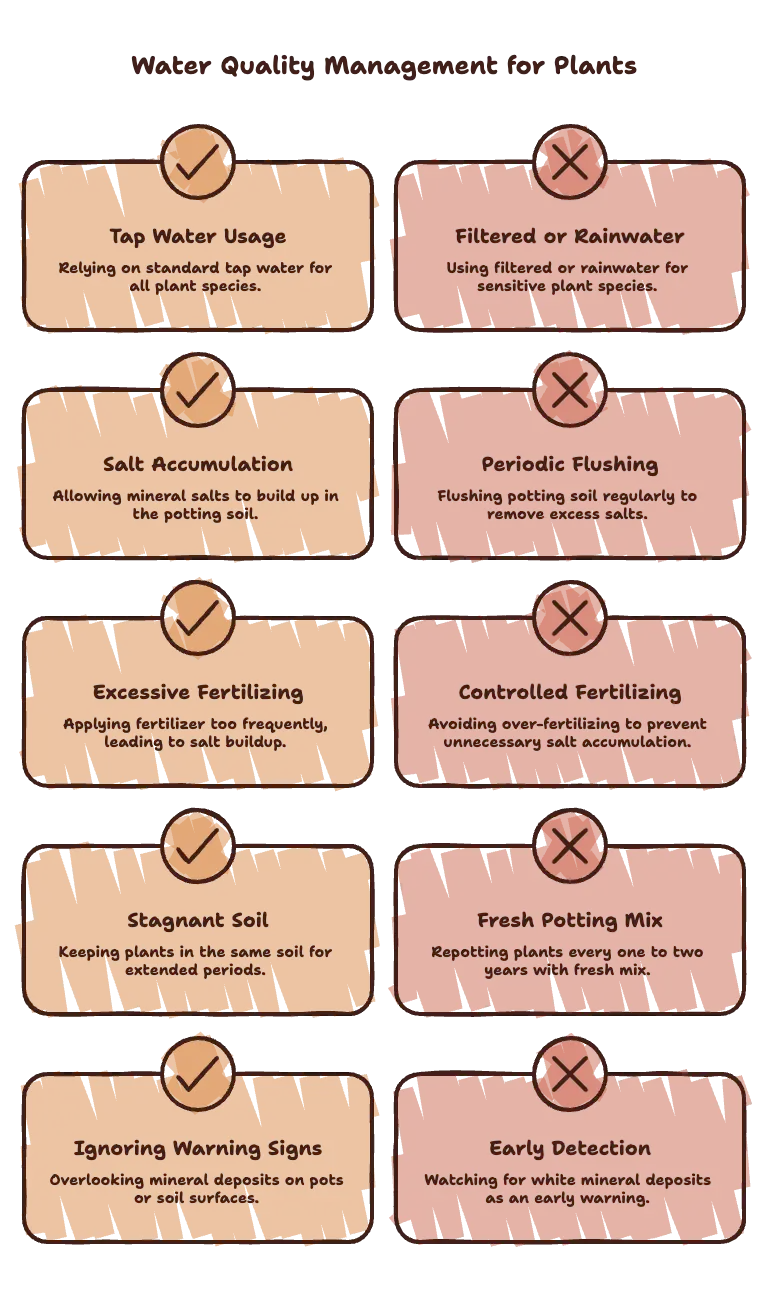
Good long-term habits can minimize the effects of poor water quality:
- Use filtered or rainwater for sensitive plant species whenever possible.
- Flush potting soil periodically to remove excess salts.
- Avoid over-fertilizing, which increases salt buildup.
- Repot plants every one to two years using fresh potting mix.
- Watch for white mineral deposits on soil or pots as an early warning sign.
While water quality isn't the most common cause of yellow leaves, it's often overlooked when more obvious problems have already been ruled out. Paying attention to what goes into your watering can can make a noticeable difference, especially for sensitive plants. Combined with proper lighting, watering, and nutrition, clean water helps create the ideal conditions for lush, vibrant green growth.
Quick Yellow Leaf Diagnosis Chart
When your plant's leaves begin turning yellow, it's easy to jump to conclusions. However, yellowing is a symptom, not a diagnosis. The best way to identify the problem is to look at the condition of the leaves, the soil, and your plant's overall environment before making any changes.
Use the quick reference guide below to narrow down the most likely cause and choose the appropriate solution.
Symptom | Most Likely Cause | Recommended Fix |
Soft, limp yellow leaves with wet soil | Overwatering | Let the soil dry out, inspect the roots, and improve drainage. |
Dry, crispy yellow leaves with bone-dry soil | Water deeply and establish a consistent watering routine. | |
Yellow patches with brown, scorched areas | Too much direct sunlight | Move the plant to bright, indirect light and avoid harsh afternoon sun. |
Older leaves yellowing with stretched, weak growth | Not enough light | Relocate the plant closer to a bright window or use a grow light. |
Yellow leaves with green veins | Nutrient deficiency | Feed with a balanced fertilizer or correct the specific nutrient deficiency. |
Soil stays wet for days after watering | Poor drainage | Repot into well-draining soil and use a pot with drainage holes. |
Roots growing from the bottom of the pot | Root-bound plant | Repot into a slightly larger container with fresh potting mix. |
One or two lower leaves turning yellow naturally | Normal aging | Remove old leaves and continue regular plant care. |
Sudden yellowing after extreme heat or cold | Temperature stress | Move the plant away from drafts, heaters, or air conditioners. |
Tiny insects, sticky residue, or webbing | Pest infestation | Isolate the plant and treat with neem oil or insecticidal soap. |
Yellow leaves with spots, mold, or black stems | Fungal or bacterial disease | Remove infected foliage, improve airflow, and treat if necessary. |
Yellow leaves with brown tips and white mineral deposits | Water quality issues | Use filtered or rainwater and flush the soil periodically. |
How to Use This Chart
Start by observing your plant rather than treating it immediately. Feel the soil, inspect both sides of the leaves, look for insects, and consider any recent changes in watering, lighting, or temperature. Often, the combination of symptoms tells a much clearer story than yellow leaves alone.
Keep in mind that more than one issue can occur at the same time. For example, a root-bound plant may also become underwatered more quickly, while poor drainage can eventually lead to root rot. Solving the primary problem first usually allows your plant to recover naturally.
With a little patience and careful observation, you'll become much more confident at diagnosing yellow leaves before they develop into more serious health problems.
Prevention Tips: Keep Your Plants Green Year-Round
The best way to deal with yellow leaves is to prevent them from appearing in the first place. While every plant has unique care requirements, most yellowing problems can be avoided by following a few simple habits consistently. Healthy plants are naturally better equipped to resist stress, recover from environmental changes, and produce vibrant green foliage throughout the year.
Water Wisely, Not on a Schedule
One of the biggest mistakes plant owners make is watering based on the calendar instead of the condition of the soil. Your plant's water needs change depending on the season, temperature, humidity, and amount of light it receives.
Before watering, always check the soil with your finger or a moisture meter. If the top layer is still damp, wait another day or two before checking again. This simple habit can prevent both overwatering and underwatering.
Give Your Plant the Right Amount of Light
Different plants have different lighting requirements. While succulents and cacti enjoy several hours of direct sunlight, many tropical houseplants prefer bright, indirect light.
Take time to learn what your specific plant needs, and don't be afraid to move it if it starts showing signs of stress. Rotating the pot every week or two also encourages balanced growth and prevents the plant from leaning toward one side.
Use Well-Draining Soil and Containers
Healthy roots need oxygen just as much as they need water. Choose a quality potting mix designed for your type of plant, and always grow plants in containers with drainage holes.
If your potting mix has become dense or compacted over time, refresh it by repotting into new soil. Better drainage leads to healthier roots and healthier leaves.
Feed Plants During the Growing Season
Plants gradually use up the nutrients available in their soil. During spring and summer, when growth is most active, apply a balanced fertilizer according to the manufacturer's instructions.
Avoid over-fertilizing, as excess nutrients can burn roots and create the very problems you're trying to prevent.
Keep an Eye Out for Pests and Disease
Regular inspections only take a minute but can save you weeks of frustration. Every time you water your plants, check both sides of the leaves for insects, sticky residue, discoloration, or unusual spots.
Catching pests or diseases early makes treatment much easier and reduces the chance of damage spreading to other plants.
Repot When Necessary
As plants grow, they eventually outgrow their containers. Repotting every one to two years, or whenever the roots become crowded, gives your plant fresh soil, more room to grow, and a renewed supply of nutrients.
Choosing a pot that's only slightly larger than the current one helps maintain healthy moisture levels while encouraging steady root development.
Maintain a Stable Environment
Plants thrive when their environment remains consistent. Avoid placing them near heating vents, air conditioners, drafty windows, or doors that frequently open and close.
Sudden changes in temperature, humidity, or light can stress even healthy plants and increase the likelihood of yellowing leaves.
Remember That Observation Is Your Best Tool
Perhaps the most valuable habit of all is simply paying attention. Healthy plants change slowly, giving you plenty of warning before serious problems develop. By regularly observing your plants, you'll quickly notice subtle changes in leaf color, growth, or watering needs and can take action before minor issues become major ones.
With proper watering, adequate light, nutritious soil, and routine care, most plants will reward you with lush green foliage and vigorous growth for years to come. A few minutes of preventative maintenance each week can make all the difference between a struggling plant and one that truly thrives.
Frequently Asked Questions
Should I remove yellow leaves from my plant?
Yes, but only after the leaf has turned mostly or completely yellow. At that point, the leaf is no longer contributing much to photosynthesis, and removing it can improve the plant's appearance while encouraging it to focus its energy on healthy new growth. Use clean, sterilized pruning scissors or gently remove the leaf if it detaches easily.
Can yellow leaves turn green again?
In most cases, no. Once a leaf has lost a significant amount of chlorophyll and turned yellow, it won't regain its original green color. However, correcting the underlying problem, such as adjusting your watering routine, improving lighting, or addressing a nutrient deficiency, will encourage healthy new leaves to grow.
Why are only the bottom leaves turning yellow?
Yellowing lower leaves are often a normal part of the plant's aging process, especially if the rest of the plant looks healthy. However, older leaves are also the first to show symptoms of overwatering, underwatering, or nitrogen deficiency. Check the soil moisture and overall plant health to determine whether the yellowing is natural or caused by a care issue.
Why are my new leaves turning yellow instead of the old ones?
When new leaves yellow first, it often points to an iron deficiency or another nutrient that the plant cannot easily move from older growth. It can also indicate root problems or environmental stress. Inspect the roots, review your fertilizing routine, and make sure the plant is receiving enough bright, indirect light.
Can too much fertilizer cause yellow leaves?
Yes. Over-fertilizing can damage roots by creating a buildup of salts in the soil, making it harder for the plant to absorb water. This can lead to yellow leaves, brown leaf tips, wilting, and slow growth. If you suspect fertilizer burn, flush the soil thoroughly with water and reduce the frequency of future applications.
How often should I water my indoor plants?
There's no single watering schedule that works for every plant. Water needs vary depending on the plant species, pot size, soil type, temperature, humidity, and season. Instead of watering on a set day each week, check the soil regularly and water only when it has dried to the appropriate depth for your specific plant.
Why are my plant leaves turning yellow after repotting?
It's not unusual for plants to experience mild transplant shock after being repotted. Temporary yellowing can occur as the roots adjust to their new environment. Keep the soil lightly moist, avoid over-fertilizing immediately after repotting, and give the plant time to recover. Most healthy plants begin producing new growth within a few weeks.
Does tap water cause yellow leaves?
Sometimes. Sensitive plants may react to chlorine, fluoride, hard water minerals, or salt buildup from repeated watering. If you've ruled out other common causes, try using filtered or rainwater for a few weeks and periodically flush the soil to remove accumulated minerals.
How can I tell if yellow leaves are caused by overwatering or underwatering?
The easiest way is to check the soil. Wet, soggy soil combined with soft, limp yellow leaves usually indicates overwatering. Dry, compact soil paired with crispy yellow leaves and brown edges is more commonly associated with underwatering. Looking at both the soil and the condition of the leaves will usually point you in the right direction.
Can a plant recover after its leaves turn yellow?
Absolutely. Many plants recover very well once the underlying problem is corrected. While the yellow leaves themselves usually won't return to green, healthy new growth is a good sign that the plant is on the road to recovery. With consistent care and a little patience, most plants can regain their strength and continue to thrive.
Final Thoughts
Seeing yellow leaves on your favorite plant can be worrying, but in most cases, it's not a sign that your plant is beyond saving. Instead, think of yellow leaves as an early warning system. They're your plant's way of letting you know that something in its environment needs a little attention.

The most important step is to avoid guessing. Before reaching for the watering can or adding fertilizer, take a few moments to observe your plant carefully. Check the soil moisture, inspect the leaves for pests, consider the lighting conditions, and think about any recent changes in temperature or care. A little detective work can save your plant from unnecessary stress and help you identify the real cause much more quickly.
Remember that healthy plant care is all about consistency rather than perfection. Water according to your plant's needs, provide the right amount of light, use well-draining soil, feed during the growing season, and inspect your plants regularly for signs of trouble. These simple habits go a long way toward preventing most of the issues covered in this guide.
It's also worth remembering that every plant is different. What works perfectly for a drought-tolerant snake plant may not suit a moisture-loving peace lily. Taking the time to understand your specific plant's natural growing conditions will help you make better care decisions and avoid many common mistakes.
Most importantly, don't be discouraged if you lose a few leaves along the way. Even experienced gardeners occasionally deal with yellowing foliage. Plant care is a learning process, and every challenge teaches you something valuable about how your plants grow and what they need to thrive.
With patience, careful observation, and the practical solutions you've learned in this guide, you'll be well equipped to diagnose yellow leaves with confidence, correct the underlying problem, and enjoy healthier, greener plants for years to come.
Whether you're caring for a single houseplant on your windowsill or a collection of indoor and outdoor plants, the same principle always applies: healthy roots, proper light, consistent care, and a little attention are the foundation of lush, vibrant foliage. Give your plants what they need, and they'll reward you with beautiful growth season after season.

Leave a comment
Your email address will not be published. Required fields are marked *