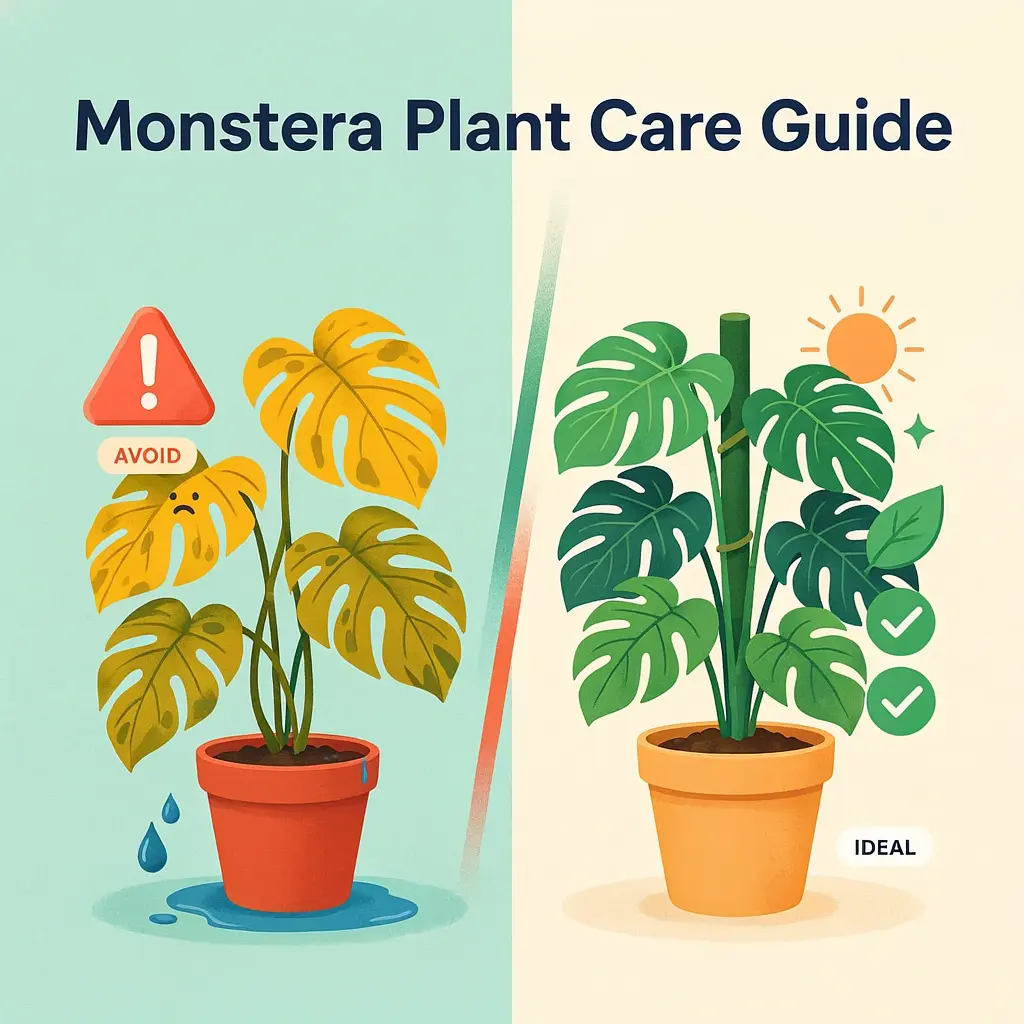
There are houseplants, and then there are Monsteras, the leafy giants that have transformed living rooms, home offices, and apartment corners into lush, tropical retreats. With their dramatic split leaves, fast-growing vines, and unmistakable jungle aesthetic, Monsteras have become one of the most sought-after indoor plants in the world. They don't just decorate a space; they become the centerpiece of it.
But growing a Monstera that turns heads isn't simply a matter of watering it every now and then. While these plants are known for being beginner-friendly, they're also famous for sending confusing signals when something isn't quite right. Yellowing leaves, brown edges, slow growth, and a complete lack of those iconic leaf splits are all common frustrations that can leave even experienced plant owners scratching their heads.
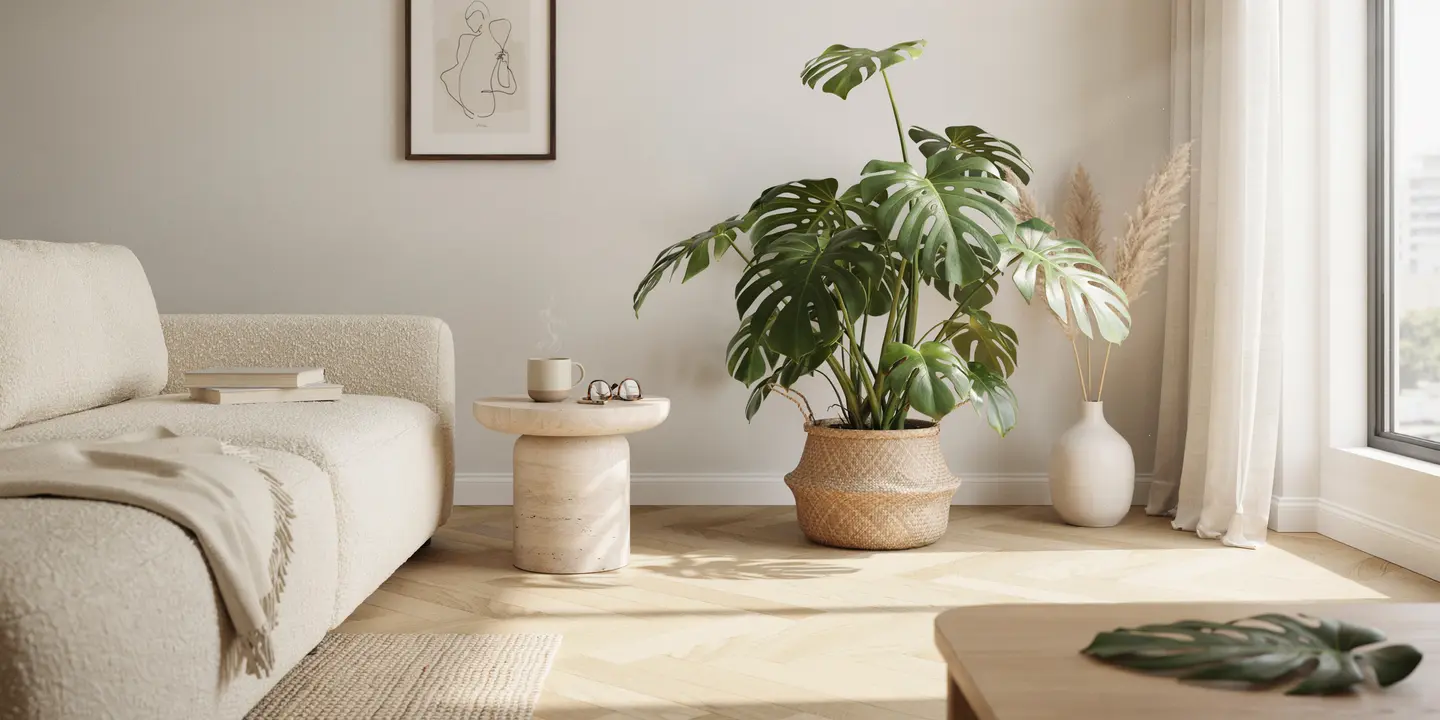
The good news? Monsteras are remarkably forgiving once you understand what they actually need. By recreating a few key elements of their natural rainforest environment, bright filtered light, well-draining soil, consistent watering, and the right amount of humidity, you can encourage faster growth, larger leaves, stronger roots, and the beautiful fenestrations that make these plants so iconic.
Whether you've just brought home your very first Monstera deliciosa or you're trying to revive a plant that's been struggling for months, this guide will walk you through every stage of successful Monstera care. You'll learn how to choose the best location, master the perfect watering routine, create the ideal soil mix, fertilize for explosive growth, train your plant to climb, propagate new Monsteras, solve common problems, and avoid the mistakes that keep these tropical beauties from reaching their full potential.
By the time you finish reading, you'll have everything you need to grow a healthier, happier Monstera with bigger, greener leaves that look like they belong in a tropical rainforest rather than a nursery shelf.
Meet the Monstera: Why Everyone Loves This Tropical Houseplant
Few indoor plants have achieved the cult status of the Monstera. Scroll through social media, flip through an interior design magazine, or visit almost any modern home, and chances are you'll spot its unmistakable split leaves adding a touch of the tropics. Equal parts elegant and wild, the Monstera has earned its reputation as one of the easiest and most rewarding houseplants to grow.
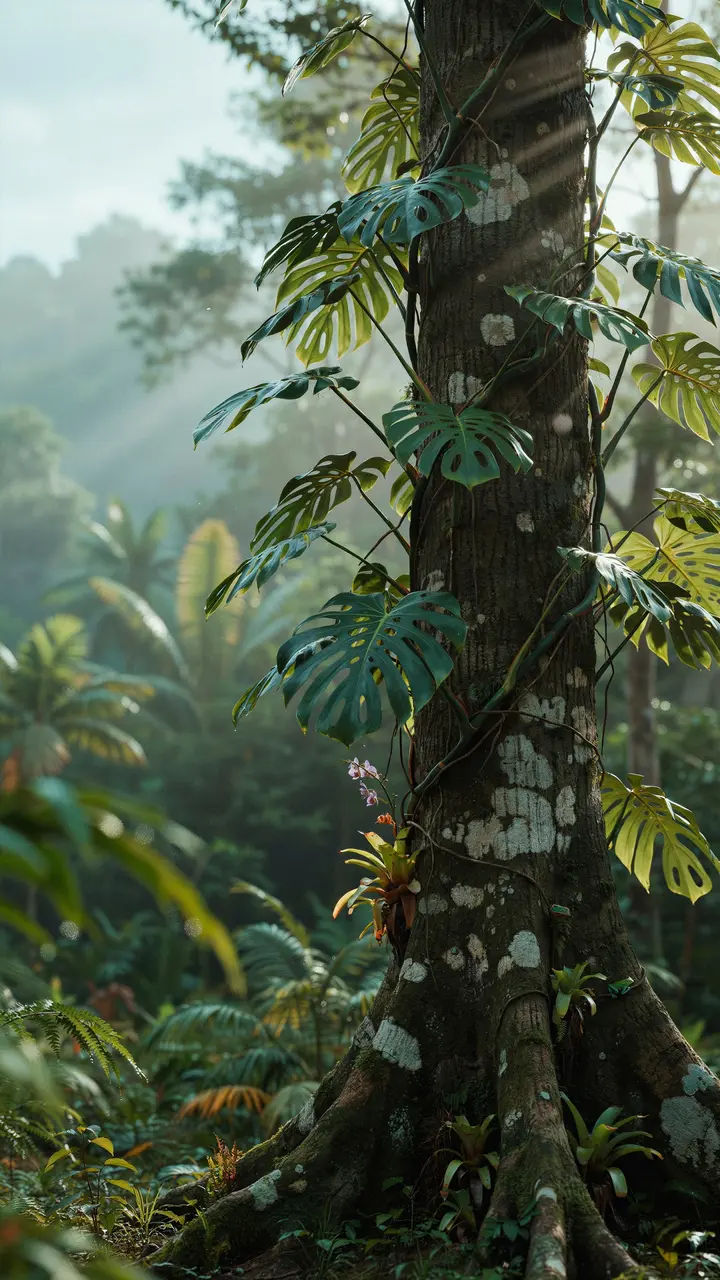
Native to the tropical rainforests of southern Mexico, Central America, and parts of South America, Monsteras thrive beneath dense forest canopies where sunlight filters gently through towering trees. Instead of growing upright like a typical tree, they begin life along the forest floor before climbing nearby trunks using thick aerial roots. This climbing habit allows them to reach brighter light over time while producing increasingly larger leaves.
One of the plant's most recognizable features is its natural leaf splits and holes, known as fenestrations. These openings aren't simply decorative, they're an ingenious adaptation. In the wild, split leaves allow strong winds and heavy tropical rain to pass through without tearing the foliage apart. The gaps may also help lower leaves receive more filtered sunlight, making the entire plant more efficient at capturing energy.
Common Monstera Varieties
Although there are dozens of species within the Monstera genus, only a handful are commonly grown as houseplants.
Monstera deliciosa is the classic variety most people recognize. It produces large, glossy leaves that can exceed two feet across indoors and become even larger outdoors. As the plant matures, each new leaf develops deeper cuts and larger fenestrations, creating the dramatic appearance that has made it an interior design favorite.
Monstera adansonii, often called the Swiss Cheese Vine, features smaller, thinner leaves covered with numerous oval-shaped holes. Its trailing growth habit makes it ideal for hanging baskets, climbing poles, or decorative shelves.
Variegated varieties such as Monstera Thai Constellation and Monstera Albo Variegata have exploded in popularity thanks to their striking cream or white marbled patterns. While undeniably beautiful, these varieties grow more slowly and require slightly brighter conditions because the white portions of the leaves contain less chlorophyll.
Why Monsteras Make Excellent Houseplants
Monsteras have become household favorites for several reasons beyond their appearance.
They're surprisingly adaptable to indoor conditions, tolerate occasional care mistakes, and grow quickly when given the right environment. Unlike many tropical plants that demand constant attention, Monsteras are forgiving enough for beginners while still rewarding experienced plant enthusiasts with impressive growth.
Their large foliage also contributes to a calmer, more inviting indoor space. A healthy Monstera can instantly soften modern interiors, fill empty corners, and create the feeling of bringing a piece of the rainforest into your home.
How Big Can a Monstera Grow?
Under ideal indoor conditions, a Monstera deliciosa commonly reaches 6 to 10 feet tall, especially when supported by a moss pole or climbing stake. Individual leaves often grow between 12 and 24 inches wide, with mature plants producing spectacular fenestrations.
Outdoors in tropical climates, Monsteras become true giants. They can climb over 60 feet into trees and develop leaves measuring more than three feet across, creating the breathtaking jungle canopy they're famous for.
Understanding where Monsteras come from, and how they naturally grow, makes every care decision much easier. The more closely you mimic their rainforest habitat with filtered light, airy soil, climbing support, warmth, and consistent moisture, the more your plant will reward you with vigorous growth and increasingly dramatic leaves.
Choosing the Right Monstera Variety
Not all Monsteras are created equal. While they share the same tropical charm and climbing growth habit, different varieties vary in size, appearance, growth rate, care requirements, and price. Choosing the right one from the beginning can save you money, frustration, and help ensure you end up with a plant that fits both your space and your experience level.
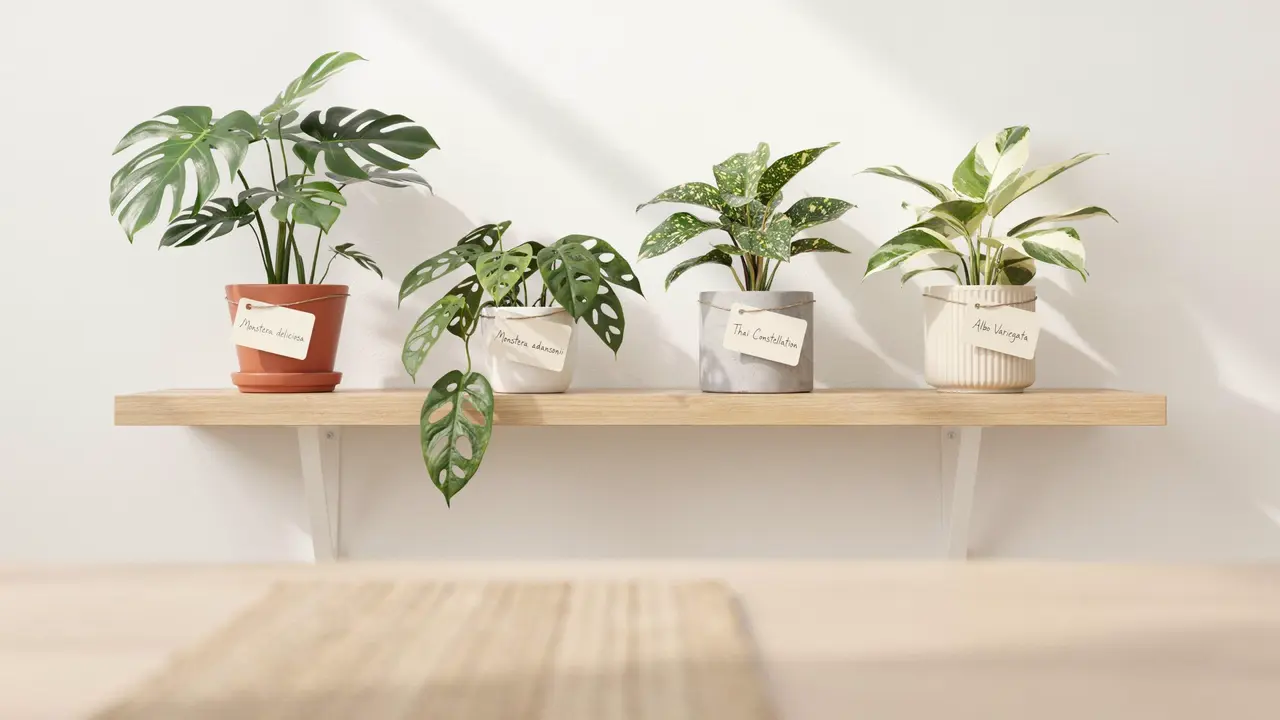
Whether you're looking for a fast-growing statement piece or a rare collector's plant, understanding the differences between the most popular Monstera varieties will help you make the best decision.
Monstera Deliciosa
If you picture a Monstera in your mind, you're probably thinking of Monstera deliciosa. It's the most common variety sold in garden centers and plant shops, and for good reason.
This species is famous for its large, glossy green leaves that develop dramatic splits and holes as the plant matures. Young plants typically produce solid, heart-shaped leaves, but each new leaf becomes increasingly larger and more deeply fenestrated under the right growing conditions.
Monstera deliciosa is also one of the easiest varieties to care for. It grows quickly, adapts well to indoor environments, and recovers from minor care mistakes more readily than many other tropical houseplants. Given bright indirect light, proper watering, and a sturdy moss pole, it can become an impressive indoor centerpiece within just a few years.
Best for:
- Beginners
- Large living rooms
- Home offices
- Anyone wanting a dramatic statement plant
Monstera Adansonii
Known as the Swiss Cheese Vine, Monstera adansonii offers a completely different look while maintaining the same tropical appeal.
Instead of broad leaves with deep splits, this variety produces smaller leaves filled with oval-shaped holes. Its vines grow quickly and naturally trail or climb, making it perfect for hanging baskets, bookshelves, or decorative moss poles.
Because the foliage is thinner than Monstera deliciosa, adansonii appreciates slightly higher humidity and more consistent watering. However, it remains relatively easy to care for and is an excellent choice for smaller spaces where a full-sized deliciosa might eventually become overwhelming.
Best for:
- Apartments
- Hanging planters
- Shelving displays
- Smaller indoor spaces
Monstera Thai Constellation
For collectors seeking something truly eye-catching, Monstera Thai Constellation is one of the most desirable houseplants available.
Its leaves are splashed with creamy white and pale yellow variegation that resembles stars scattered across a night sky, hence the name "Thai Constellation." Every leaf develops a unique pattern, making no two plants exactly alike.
Unlike naturally occurring variegated Monsteras, Thai Constellation is tissue-cultured, meaning its variegation is genetically stable and less likely to disappear over time.
Because portions of each leaf lack chlorophyll, the plant grows more slowly than a standard Monstera deliciosa. It also benefits from brighter indirect light to compensate for its reduced ability to photosynthesize.
Best for:
- Plant collectors
- Bright indoor spaces
- Decorative focal points
- Experienced hobbyists
Monstera Albo Variegata
Often considered the "holy grail" of Monstera collecting, Monstera Albo Variegata features bold white marbling, sectoral patches, and dramatic half-moon leaves that make every new leaf an exciting surprise.
Unlike Thai Constellation, Albo variegation occurs naturally through genetic mutation, making each plant completely unique. Because of this instability, some leaves may emerge almost entirely green while others contain large white sections.
Although breathtakingly beautiful, Albo Monsteras require more attention. Excessive white variegation slows growth, increases sensitivity to direct sunlight, and demands careful watering to prevent stress.
They also tend to command significantly higher prices due to their rarity and slower propagation.
Best for:
- Dedicated collectors
- Experienced indoor gardeners
- Display plants
- Specialty plant enthusiasts
Which Monstera Is Best for Beginners?
If you're buying your very first Monstera, Monstera deliciosa remains the clear winner.
It combines fast growth, resilience, affordability, and forgiving care requirements, making it an excellent introduction to tropical houseplants. Even if you occasionally forget to water it or miss a feeding schedule, a healthy deliciosa is remarkably capable of bouncing back.
If you're working with limited space, Monstera adansonii is another excellent beginner-friendly option thanks to its manageable size and attractive trailing vines.
Variegated varieties like Thai Constellation and Albo Variegata are stunning investments, but they're generally better suited for growers who already have experience maintaining healthy tropical plants and understand the extra attention these premium varieties require.
Ultimately, the best Monstera isn't necessarily the rarest or most expensive, it's the one that matches your lifestyle, available space, lighting conditions, and level of experience. Choose wisely, provide the right care, and you'll enjoy years of lush, tropical growth that only becomes more impressive with time.
The Perfect Lighting Conditions for Faster Growth
If there's one factor that has the biggest impact on your Monstera's health, it's light. Everything from leaf size and growth speed to vibrant color and those iconic natural splits depends on your plant receiving the right amount of illumination. Get the lighting right, and your Monstera will reward you with vigorous growth and increasingly dramatic foliage. Get it wrong, and growth can slow to a crawl.
The goal is to mimic the plant's natural habitat. In tropical rainforests, Monsteras grow beneath towering trees where they receive plenty of bright, filtered sunlight throughout the day rather than hours of harsh, direct sun. Recreating those conditions indoors is the key to long-term success.
Bright Indirect Light Explained
You'll often hear that Monsteras need "bright indirect light," but what does that actually mean?
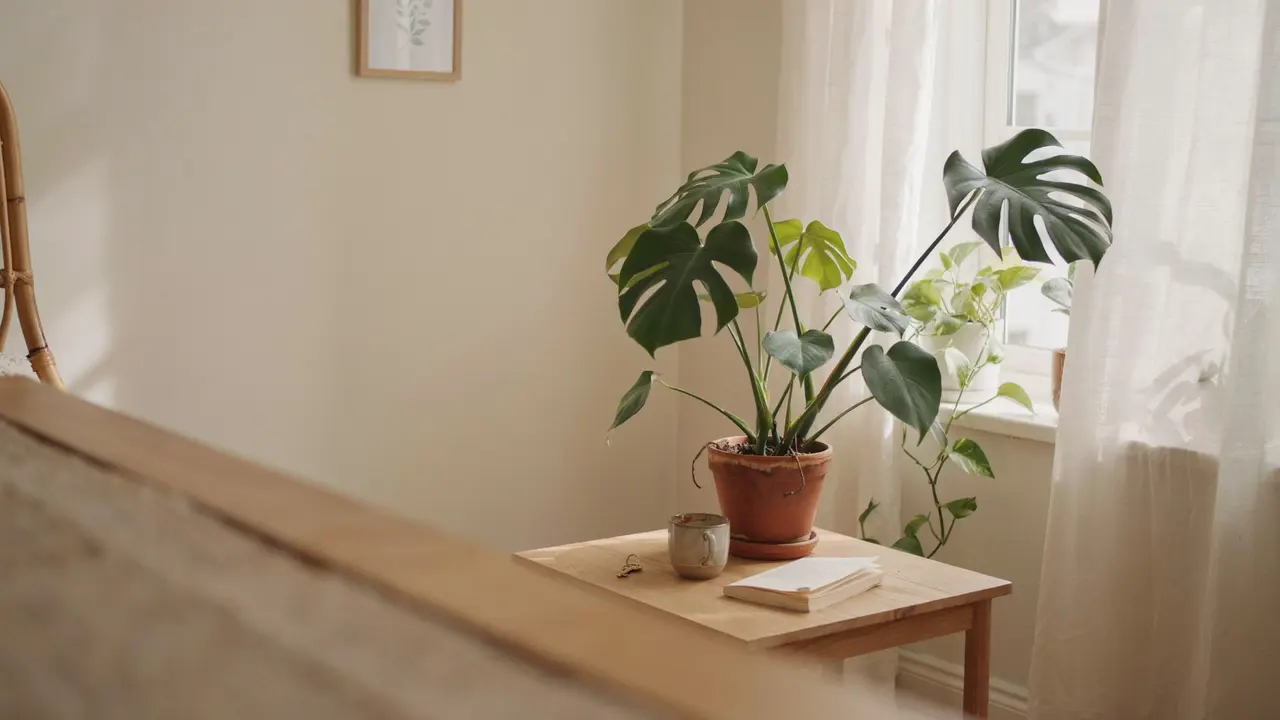
Bright indirect light is sunlight that fills a room without shining directly onto the leaves for extended periods. Imagine standing beneath the canopy of a forest: it's bright enough to see clearly, but the sun's rays are softened by layers of foliage. That's exactly what your Monstera prefers.
The ideal location is near an east-facing window, where the plant receives gentle morning sunlight, or a few feet back from a south- or west-facing window with a sheer curtain to diffuse the stronger afternoon rays. North-facing windows can also work if they provide consistent brightness, though growth may be slower.
A simple test is to stand where your plant sits during the day. If the room feels bright enough to comfortably read without turning on a light, your Monstera is likely getting enough indirect light.
Can a Monstera Survive in Low Light?
Yes, but surviving and thriving are two very different things.
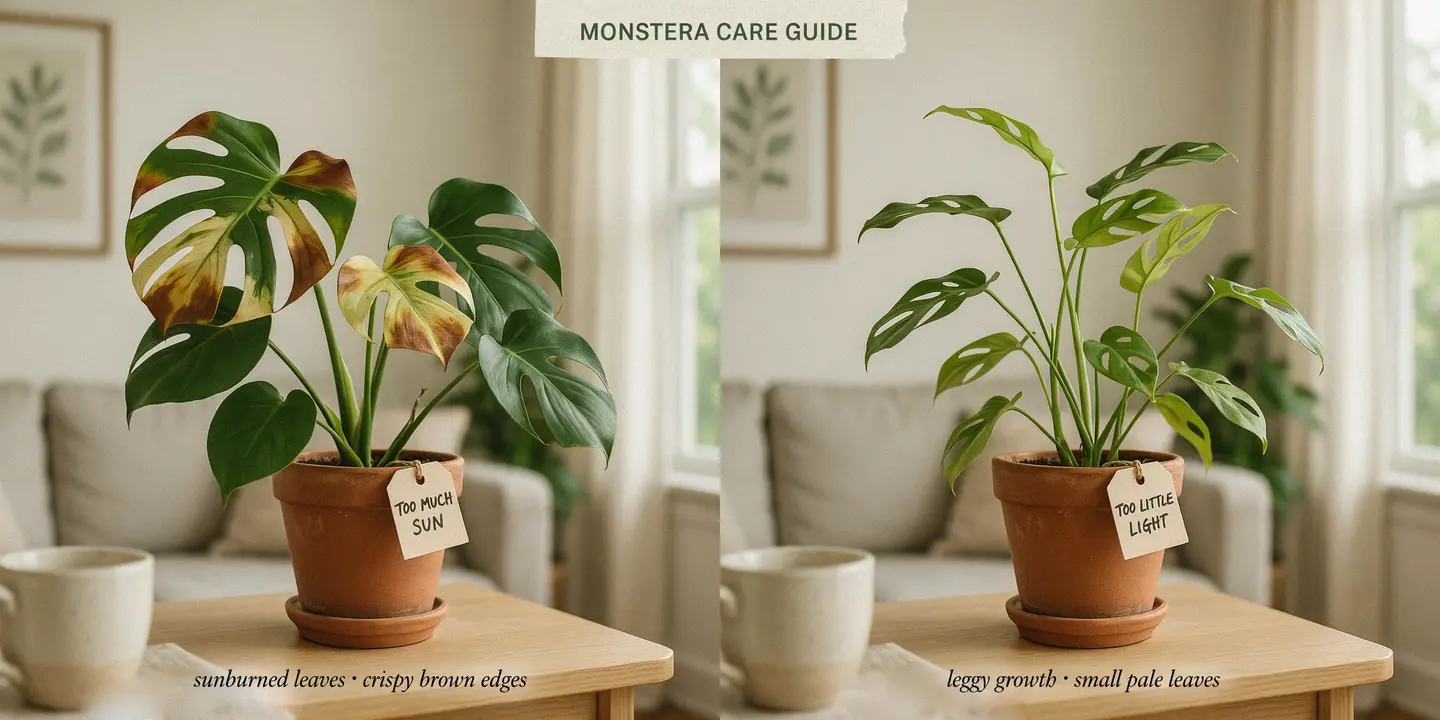
Monsteras are adaptable and can tolerate lower light levels better than many tropical houseplants. However, low light often leads to slower growth, smaller leaves, longer gaps between leaves on the stem, and fewer or no fenestrations.
The plant will also stretch toward the nearest light source, creating a leggy, uneven appearance. While it may remain alive for years in dim conditions, it probably won't develop the lush, dramatic look that makes Monsteras so popular.
If your home doesn't receive much natural light, consider supplementing with a full-spectrum LED grow light for 10 to 12 hours a day.
Signs Your Monstera Gets Too Much Sun
Although Monsteras enjoy bright conditions, intense direct sunlight can damage their foliage, especially during the hottest part of the day.
Watch for these warning signs:
- Brown, crispy patches on the leaves
- Yellowing areas that appear suddenly after strong sunlight
- Bleached or faded spots
- Curling leaf edges
- Dry, brittle foliage
These symptoms are often the result of leaf scorch rather than disease. Moving the plant slightly farther from the window or using a sheer curtain is usually enough to prevent further damage.
Signs Your Monstera Needs More Light
Just as too much sunlight can cause problems, too little light limits the plant's ability to produce energy.
Common indicators include:
- Slow or stalled growth
- Small new leaves
- Leaves without splits or holes
- Long, stretched stems between leaves
- Leaning heavily toward windows
- Pale green foliage
If you notice several of these signs, gradually move your Monstera closer to a brighter location. Avoid making sudden changes from very low light to intense sunlight, as this can stress the plant.
Best Window Placement
Choosing the right window can make all the difference.
East-facing windows are often considered ideal because they provide several hours of gentle morning sun followed by bright indirect light for the rest of the day.
South-facing windows offer plenty of brightness but usually require a sheer curtain or positioning the plant a few feet back to prevent leaf burn.
West-facing windows can work well, provided the intense afternoon sun is filtered before it reaches the leaves.
North-facing windows generally provide the least light. While a Monstera can survive there, it may benefit from supplemental grow lights to maintain healthy growth.
If your plant begins leaning noticeably in one direction, rotate the pot about a quarter turn every week or two. This encourages more even growth and helps create a fuller, more balanced appearance.
A Simple Rule to Remember
When it comes to Monsteras, think bright but protected. They crave plenty of light, but they don't want to sit under harsh midday sun. Replicating the dappled light of a tropical rainforest is one of the easiest ways to encourage larger leaves, stronger stems, and the spectacular fenestrations that every Monstera owner hopes to see.
Before adjusting watering schedules or adding fertilizer, always evaluate your lighting first. In many cases, improving light alone is enough to dramatically boost your plant's health and growth.
How Often Should You Water a Monstera?
Ask ten Monstera owners how often they water their plant, and you'll probably get ten different answers. That's because there isn't a magic schedule that works for every home. The amount of water your Monstera needs depends on factors like light, temperature, humidity, pot size, soil type, and even the season.
Instead of watering on the same day every week, the secret is learning to water when your plant actually needs it. Monsteras prefer soil that stays lightly moist but never soggy. Allowing the soil to dry slightly between waterings encourages healthy root development and helps prevent one of the biggest killers of houseplants: root rot.
The Finger Test
One of the easiest and most reliable ways to know when it's time to water is the simple finger test.
Insert your finger about 2 to 3 inches (5 to 7 cm) into the soil. If the top layer feels dry but the soil beneath is still slightly cool and moist, it's usually the perfect time to water.
If the soil still feels damp near the surface, wait a few more days before checking again. Watering too soon can leave the roots sitting in constantly wet soil, increasing the risk of fungal diseases and rot.
For larger Monsteras, a moisture meter can also be a helpful tool, especially if you're unsure how quickly your soil dries out.
Seasonal Watering Schedule
Your Monstera's watering needs naturally change throughout the year.
Spring and Summer
During the active growing season, your Monstera is producing new leaves, extending roots, and using more water. Most plants need watering approximately every 7 to 10 days, though this can vary depending on your home's conditions.
Always check the soil first rather than relying solely on the calendar.
Fall
As temperatures cool and daylight hours become shorter, growth begins to slow. Watering often decreases to every 10 to 14 days, although some homes may still require more frequent watering if indoor heating keeps the air warm.
Winter
Winter is usually the plant's resting period. With slower growth and lower light levels, Monsteras consume much less moisture. Many plants only need watering every 2 to 3 weeks.
Overwatering during winter is one of the most common reasons otherwise healthy Monsteras decline.
Overwatering vs. Underwatering
Knowing the difference between these two problems can save your plant.
Signs of Overwatering
- Yellow leaves, especially older ones
- Soft or mushy stems
- Drooping despite wet soil
- Musty-smelling potting mix
- Black or rotting roots
- Fungus gnats hovering around the soil
Overwatering isn't simply giving too much water at once, it's watering too frequently before the soil has had time to dry.
Signs of Underwatering
- Dry, crispy leaf edges
- Curling leaves
- Soil pulling away from the sides of the pot
- Limp stems
- Slow growth
- Leaves becoming thin or papery
Fortunately, Monsteras usually recover from underwatering more easily than from prolonged root rot caused by excessive watering.
Best Water to Use
Monsteras aren't overly fussy about water quality, but some types of water can promote healthier growth over time.
Rainwater is often considered the best option because it's naturally soft and free from added chemicals.
Filtered water is another excellent choice, especially in areas where tap water contains high levels of chlorine, fluoride, or dissolved minerals.
If you use tap water, letting it sit uncovered overnight allows some chlorine to dissipate before watering. In most cases, this is perfectly adequate for healthy indoor Monsteras.
Whatever water source you choose, try to use room-temperature water. Extremely cold water can temporarily shock the roots, while hot water may damage delicate root tissues.
Water Thoroughly Every Time
When you do water, water deeply.
Slowly pour water over the soil until it begins flowing freely from the drainage holes at the bottom of the pot. This ensures the entire root system receives moisture rather than just the top layer of soil.
After watering, allow the excess water to drain completely. Never let your Monstera sit in a saucer full of standing water, as constantly wet roots quickly lead to oxygen deprivation and root rot.
Drainage Is Just as Important as Watering
Even a perfectly timed watering routine won't help if excess water has nowhere to go.
Always choose a pot with drainage holes, and use a chunky, well-aerated soil mix that allows water to flow freely. Good drainage ensures roots receive both moisture and oxygen, two essentials for vigorous growth.
A Simple Watering Rule to Remember
Forget strict schedules and pay attention to your plant instead. Check the soil regularly, water deeply when the top few inches feel dry, and let excess water drain away completely.
A Monstera that receives the right amount of water develops stronger roots, larger leaves, healthier stems, and steady growth throughout the year. In most cases, consistency, not frequency, is what makes the biggest difference.
Choosing the Best Soil Mix
If lighting is the engine behind healthy Monstera growth, then soil is the foundation. Even with perfect watering habits, your plant will struggle if its roots are trapped in heavy, compacted soil that holds too much moisture. On the other hand, a well-draining, airy soil mix allows roots to breathe, absorb nutrients efficiently, and support the large, lush foliage Monsteras are known for.
The best soil doesn't just hold water, it strikes the perfect balance between moisture retention, drainage, and airflow. By recreating the loose, organic forest floor where Monsteras naturally grow, you'll set your plant up for faster growth, stronger roots, and healthier leaves.
Why Regular Potting Soil Isn't Enough
Many standard potting mixes are designed to retain moisture for a wide range of houseplants. While that sounds convenient, it can create problems for Monsteras.
Dense potting soil tends to stay wet for too long, reducing airflow around the roots. Without enough oxygen, roots become stressed, making them more vulnerable to fungal diseases and root rot. Over time, the soil also compacts, making it harder for water to drain evenly and for roots to spread.
A Monstera's roots naturally grow through loose organic debris, bark, and decaying plant material, not dense, muddy soil. Mimicking those conditions indoors is one of the easiest ways to improve overall plant health.
The Ideal Chunky Aroid Mix
Monsteras belong to a group of tropical plants known as aroids, and they thrive in chunky, fast-draining soil mixes designed specifically for this family.
A quality aroid mix should feel light, airy, and coarse rather than smooth or compact. Water should flow through easily while leaving enough moisture behind for the roots to absorb.
An ideal mix usually includes:
- High-quality potting soil for nutrients and moisture retention
- Orchid bark to create air pockets
- Perlite or pumice for drainage
- Coco coir or peat moss for balanced moisture
- Horticultural charcoal to improve freshness and reduce impurities
- Worm castings or compost for gentle nutrition
This combination creates a soil structure that encourages vigorous root growth while greatly reducing the chances of overwatering.
Ingredients That Improve Drainage
Each ingredient plays an important role in keeping your Monstera healthy.
Orchid bark creates large spaces within the soil, allowing oxygen to reach the roots while preventing compaction.
Perlite is lightweight volcanic glass that improves drainage and prevents excess moisture from accumulating around the root system.
Pumice performs a similar function but is slightly heavier, helping anchor larger Monsteras while maintaining excellent airflow.
Coco coir retains just enough moisture without becoming waterlogged, making it an excellent sustainable alternative to peat moss.
Horticultural charcoal helps absorb impurities, improves drainage, and may reduce odors and harmful bacteria in consistently moist soil.
Together, these ingredients create the loose, breathable environment that Monsteras love.
DIY Monstera Soil Recipe
If you enjoy mixing your own potting blends, a homemade aroid mix is both affordable and highly effective.
A simple recipe includes:
- 40% high-quality indoor potting soil
- 25% orchid bark
- 20% perlite or pumice
- 10% coco coir
- 5% worm castings or horticultural charcoal
Mix the ingredients thoroughly before potting your Monstera. The finished blend should feel chunky, fluffy, and easy to separate with your hands rather than dense or muddy.
This type of soil allows roots to receive consistent moisture while drying quickly enough to prevent prolonged saturation.
Signs Your Soil Needs Replacing
Even the best potting mix doesn't last forever.
Over time, organic materials break down, reducing airflow and causing the soil to become compacted. Nutrients are gradually depleted, and drainage slows as smaller particles fill the spaces between larger components.
You may need to refresh your Monstera's soil if you notice:
- Water pooling on the surface before soaking in
- Soil remaining wet for more than a week
- A sour or musty smell
- Slow growth despite proper care
- Compacted, dense soil that feels heavy
- Roots circling tightly around the pot
Most healthy Monsteras benefit from fresh soil every one to two years, often when it's time to repot into a slightly larger container.
Don't Forget the Pot
Even the perfect soil can't compensate for the wrong container.
Always use a pot with one or more drainage holes so excess water can escape freely. Terracotta pots dry out more quickly and provide excellent airflow, making them a good choice for growers who tend to overwater. Plastic and ceramic pots retain moisture longer, which can work well in dry homes or warmer climates, but they require a little more attention to watering frequency.
Whichever material you choose, avoid decorative containers without drainage unless you're using them as outer cachepots.
Healthy Soil Means Healthy Leaves
Many common Monstera problems, including yellow leaves, slow growth, drooping stems, and root rot, begin below the surface. By investing in a loose, well-draining aroid mix, you're creating the ideal environment for strong roots to thrive.
When roots have the perfect balance of moisture, nutrients, and oxygen, the rest of the plant follows suit. You'll notice steadier growth, larger leaves, richer green color, and the spectacular fenestrations that make Monsteras one of the most rewarding houseplants to grow.
Humidity and Temperature: The Secret to Huge Leaves
Monsteras may adapt well to life indoors, but they're still tropical plants at heart. In their native rainforest habitat, they're surrounded by warm temperatures, consistent moisture in the air, and stable growing conditions year-round. Recreating even part of that environment can make a remarkable difference in your plant's health.
If you've ever wondered why some Monsteras produce enormous, glossy leaves while others struggle with brown edges or slow growth, humidity and temperature are often the missing pieces of the puzzle.
The good news is that you don't need to turn your home into a rainforest. A few simple adjustments can provide the conditions your Monstera needs to thrive.
Ideal Humidity Levels
Monsteras grow best when humidity levels stay between 60% and 80%. At these levels, leaves remain hydrated, aerial roots develop more readily, and new growth unfurls with fewer problems.
That said, one reason Monsteras are such popular houseplants is their ability to tolerate average indoor humidity. In many homes, humidity falls between 40% and 60%, and healthy Monsteras can still grow well with proper watering and light.
Problems usually begin when humidity drops below 40%, especially during winter when indoor heating dries out the air.
Low humidity can lead to:
- Brown, crispy leaf tips
- Dry leaf edges
- Slower growth
- New leaves sticking together while unfurling
- Smaller leaves with fewer fenestrations
If you notice these symptoms, increasing humidity may help your plant recover.
Best Indoor Temperatures
Monstereras prefer the same temperatures most people find comfortable.
Aim to keep your plant between 65°F and 85°F (18°C to 29°C) throughout the year. This range encourages active growth while minimizing stress.
Growth naturally slows once temperatures consistently fall below 60°F (16°C). Prolonged exposure to temperatures below 50°F (10°C) can damage foliage, stunt growth, and, in severe cases, kill the plant.
Likewise, excessive heat above 90°F (32°C) may cause leaves to wilt or dry out more quickly unless humidity is also increased.
Consistency matters just as much as the actual temperature. Avoid placing your Monstera near heating vents, fireplaces, air conditioners, frequently opened exterior doors, or drafty windows where sudden temperature swings can stress the plant.
Winter Care
Winter presents unique challenges for indoor Monsteras.
Shorter days mean less available light, while indoor heating often creates warm but extremely dry conditions. Since your Monstera grows more slowly during this period, its water and nutrient needs naturally decrease.
To keep your plant healthy through winter:
- Water less frequently, allowing the soil to dry slightly more between waterings.
- Stop or reduce fertilizing until active growth resumes in spring.
- Move the plant closer to a bright window if daylight becomes limited.
- Keep leaves clean so they can absorb as much available light as possible.
- Protect the plant from cold drafts and sudden temperature drops.
Don't be alarmed if your Monstera doesn't produce many new leaves during winter. A slower growth rate is completely normal.
Should You Use a Humidifier?
If your home's humidity regularly falls below 40%, a humidifier can make a noticeable difference, especially during the colder months.
Running a humidifier nearby helps create a more stable environment without soaking the soil or leaves. Consistent humidity encourages larger foliage, healthier aerial roots, and smoother leaf unfurling.
If a humidifier isn't practical, you can also:
- Group tropical plants together to create a naturally humid microclimate.
- Place the pot on a pebble tray filled with water, ensuring the bottom of the pot isn't sitting directly in the water.
- Keep the plant in naturally humid rooms, such as bright bathrooms or kitchens, if lighting conditions are suitable.
While these methods may not dramatically increase humidity throughout the room, they can provide a modest improvement around the plant.
Preventing Dry Leaf Edges
Brown tips and crispy leaf margins are among the most common complaints from Monstera owners. Although low humidity is often responsible, it's rarely the only possible cause.
Dry leaf edges can also result from:
- Inconsistent watering
- Mineral buildup from hard tap water
- Excess fertilizer
- Intense direct sunlight
- Extremely dry indoor air
Rather than assuming humidity is the culprit, evaluate your overall care routine. In many cases, correcting several small issues produces much better results than focusing on humidity alone.
Is Misting Worth It?
Many people instinctively reach for a spray bottle when caring for tropical plants, but misting isn't the long-term solution it's often made out to be.
A quick mist raises humidity around the leaves for only a few minutes before the moisture evaporates. While occasional misting won't usually harm a healthy Monstera, it doesn't provide the sustained humidity the plant truly benefits from.
Instead of relying on daily misting, focus on maintaining consistent room humidity, proper watering, and good airflow. These factors have a far greater impact on your Monstera's long-term health.
Create a Rainforest, Not a Greenhouse
Monsteras don't need perfect tropical conditions to flourish, they simply appreciate a warm, stable environment with moderate to high humidity. When combined with bright indirect light, well-draining soil, and thoughtful watering, these conditions encourage stronger stems, faster growth, and the large, beautifully fenestrated leaves that every Monstera owner hopes to see.
Think of humidity and temperature as supporting players rather than the stars of the show. They won't compensate for poor lighting or overwatering, but when everything works together, your Monstera can truly reach its full potential.
Fertilizing Your Monstera for Bigger, Greener Leaves
A healthy Monstera can survive for quite some time without fertilizer, but if your goal is rapid growth, massive leaves, and rich green foliage, feeding your plant regularly can make a noticeable difference. Think of fertilizer as a supplement rather than a necessity, it doesn't replace proper light, watering, or soil, but it gives your Monstera the extra nutrients it needs to perform at its best.
As your Monstera grows, it gradually uses up the nutrients stored in its potting mix. Without replenishing them, new growth may become smaller, slower, or less vibrant. A balanced feeding routine helps replace those lost nutrients and supports everything from root development to leaf production.
When to Fertilize
Timing is just as important as the fertilizer itself.
Monsteras should only be fertilized during their active growing season, which typically runs from early spring through late summer. During this period, the plant is actively producing new leaves, extending roots, and climbing if given support.
A good general schedule is to fertilize once every four to six weeks with a balanced liquid fertilizer diluted to half the strength recommended on the label. This provides a steady supply of nutrients without overwhelming the roots.
As temperatures cool and daylight hours shorten in autumn, growth naturally slows. By winter, most indoor Monsteras enter a resting phase and require little to no fertilizer. Feeding during this time often results in nutrient buildup rather than healthier growth.
Best Fertilizer Types
Not all fertilizers are created equal, but Monsteras aren't especially picky.
A balanced fertilizer with an equal or nearly equal ratio of nitrogen (N), phosphorus (P), and potassium (K) works well for most plants. Common formulations include:
- 10-10-10
- 20-20-20
- 3-1-2 ratios designed for foliage plants
Nitrogen encourages lush green leaf growth, phosphorus supports healthy roots, and potassium strengthens overall plant health and resilience.
Liquid fertilizers are popular because they're easy to apply and allow you to control exactly how much your plant receives. Slow-release fertilizers are another convenient option, gradually feeding the plant over several months with minimal maintenance.
Organic vs. Synthetic Options
Both organic and synthetic fertilizers can produce excellent results when used correctly.
Organic fertilizers release nutrients gradually as they break down in the soil. Options such as worm castings, compost, fish emulsion, and seaweed extract improve soil health while providing a gentle source of nutrition.
Advantages include:
- Lower risk of fertilizer burn
- Improved soil structure over time
- Beneficial microbial activity
- More gradual nutrient release
Synthetic fertilizers, on the other hand, provide nutrients that are immediately available to the plant. They often produce faster visible growth but require more careful application to avoid overfeeding.
Advantages include:
- Precise nutrient ratios
- Rapid plant response
- Easy dosing
- Widely available
Whichever type you choose, consistency matters more than brand. A modest, regular feeding schedule almost always outperforms occasional heavy applications.
Avoiding Fertilizer Burn
One of the biggest mistakes new plant owners make is assuming that more fertilizer means faster growth.
In reality, excessive fertilizer can damage roots, cause salt buildup in the soil, and lead to symptoms such as:
- Brown leaf tips
- Crispy leaf edges
- Yellowing foliage
- White crust on the soil surface
- Wilting despite adequate watering
To avoid fertilizer burn:
- Always dilute liquid fertilizer unless the product specifically states otherwise.
- Never fertilize completely dry soil. Water your Monstera first if the potting mix is dry.
- Follow the recommended feeding schedule rather than fertilizing every time you water.
- Flush the soil with clean water every few months to help wash away accumulated mineral salts.
Healthy growth comes from steady nutrition, not excessive feeding.
Seasonal Feeding Schedule
A simple annual routine keeps things easy.
Spring
As new leaves begin emerging, resume fertilizing every four to six weeks. This supports vigorous root development and encourages strong early-season growth.
Summer
Continue feeding consistently while the plant remains actively growing. This is when Monsteras typically produce their largest and fastest-growing leaves.
Fall
Gradually reduce fertilizing as growth begins to slow. If your Monstera is still producing new leaves in a warm, bright home, you may continue feeding lightly, but less frequently.
Winter
Pause fertilizing altogether for most indoor plants. Your Monstera's energy needs are much lower during this resting period, and excess nutrients can accumulate in the soil.
Watch Your Plant, Not Just the Calendar
Every Monstera grows at its own pace. A plant sitting in bright indirect light with ideal humidity may continue producing leaves well into autumn, while another growing in lower light may slow down much earlier.
Pay attention to your plant's behavior. If it's actively producing healthy new leaves, it's still using nutrients. If growth has paused completely, it's usually best to wait before fertilizing again.
Fertilizer Supports Growth, It Doesn't Create It
It's important to remember that fertilizer isn't a miracle cure. A Monstera kept in poor lighting or overwatered soil won't suddenly thrive simply because it's being fed.
The healthiest, fastest-growing Monsteras combine four essentials:
- Bright indirect light
- Proper watering
- Well-draining soil
- Consistent but moderate fertilization
When these factors work together, your Monstera has everything it needs to produce stronger stems, deeper green foliage, larger leaves, and increasingly dramatic fenestrations season after season.
Supporting Your Monstera with a Moss Pole
One of the biggest differences between an average-looking Monstera and one with enormous, deeply split leaves often comes down to a single factor: support.
In the wild, Monsteras don't grow as free-standing plants. They begin life on the rainforest floor and quickly start climbing nearby trees using thick aerial roots. As they climb higher toward brighter light, their leaves become significantly larger, stronger, and more heavily fenestrated.
Indoors, your Monstera has the same instinct. Without something to climb, it often grows outward instead of upward, producing longer stems, smaller leaves, and a less compact appearance. Giving it a climbing structure encourages more natural growth and can dramatically improve its overall health.
Why Monsteras Love to Climb
Monstereras are classified as hemiepiphytes, meaning they spend part of their life rooted in the ground while also climbing trees for support.
Their aerial roots aren't just decorative. In nature, these roots grip rough bark, absorb moisture from humid air, and help anchor the plant as it climbs toward sunlight.
When a Monstera is allowed to climb indoors, several positive changes usually follow:
- Larger leaves
- More pronounced fenestrations
- Stronger stems
- Faster upward growth
- Better overall structure
- Healthier aerial roots
Rather than sprawling across furniture or trailing awkwardly over the edge of a pot, the plant grows in a more upright, natural form.
Moss Pole vs. Coco Pole
Two of the most common support options are moss poles and coco coir poles.
Moss poles are generally considered the gold standard for Monsteras.
Because sphagnum moss retains moisture, aerial roots naturally grow into it, creating stronger attachment and encouraging more vigorous climbing. Keeping the moss slightly damp also provides additional humidity around the roots.
Coco coir poles are another popular choice. They're durable, cleaner to maintain, and often less expensive than moss poles. However, because they retain less moisture, aerial roots may not attach as aggressively.
If your primary goal is producing larger leaves and encouraging rapid vertical growth, a moss pole usually offers the greatest benefits.
How to Install a Moss Pole
It's easiest to add a support pole while repotting your Monstera, but it can also be installed later with a little care.
Follow these basic steps:
- Choose a sturdy pole that's tall enough to support future growth.
- Insert the pole close to the center or back of the pot, avoiding major roots whenever possible.
- Position the main stem against the pole.
- Secure the stem loosely using soft plant ties, Velcro garden tape, or flexible twine.
- Continue attaching new growth as the plant climbs.
Avoid tying the stems too tightly. They should be held securely while still having room to expand naturally.
Training Aerial Roots
As your Monstera grows, you'll notice thick aerial roots emerging from the stem.
Many new plant owners wonder whether these roots should be cut off. In most cases, the answer is no.
Instead, gently guide the aerial roots toward the moss pole or into the soil. Once they make contact, they'll often begin anchoring themselves naturally.
If some aerial roots grow in unusual directions, don't worry. They're a normal part of the plant's growth habit and don't need to be perfectly tidy.
Benefits for Leaf Size
Perhaps the biggest advantage of using a moss pole is its effect on leaf development.
When Monsteras receive proper support, they often produce:
- Larger leaves
- Deeper natural splits
- More interior holes
- Shorter spacing between leaves
- Stronger, thicker stems
While lighting remains the most important factor in leaf size, climbing support works alongside good light to encourage the mature growth habit seen in nature.
It's common for leaves to become noticeably larger within several growth cycles after the plant begins climbing successfully.
Common Mistakes to Avoid
Supporting a Monstera is relatively simple, but a few mistakes can limit its benefits.
Avoid:
- Using a pole that's too short for future growth.
- Allowing the plant to lean away from the support.
- Tying stems too tightly.
- Ignoring new growth instead of attaching it as it develops.
- Expecting aerial roots to disappear, they're supposed to be there.
Remember that climbing is a gradual process. The plant won't attach itself overnight, but with patience and gentle guidance, it will begin using the support naturally.
Give Your Monstera a Tree to Climb
If you've ever admired photos of Monsteras with enormous, dramatic leaves, chances are those plants were climbing something.
Adding a moss pole doesn't just make your plant look taller, it encourages it to behave the way nature intended. Combined with bright indirect light, proper watering, and healthy soil, climbing support can be the difference between a plant that simply survives and one that becomes a spectacular tropical centerpiece.
Sometimes the biggest improvement you can make isn't more fertilizer or more water, it's simply giving your Monstera something to climb.
Repotting Your Monstera the Right Way
No matter how carefully you water or fertilize your Monstera, there comes a point when it simply outgrows its home. As the root system expands, the plant eventually fills every available inch of soil, leaving little room for water, oxygen, or nutrients. When that happens, repotting becomes one of the best things you can do to keep your Monstera healthy and growing.
Fortunately, Monsteras don't need frequent repotting. In fact, they prefer being slightly snug in their pots. Repot too often or move to an oversized container, and you may end up creating more problems than you solve. The key is knowing when your plant is truly ready and how to make the transition with as little stress as possible.
Signs It's Root Bound
A root-bound Monstera has reached the point where its roots have filled most of the available space inside the pot. While a mildly root-bound plant is usually fine, severe crowding can slow growth and make watering more difficult.
Watch for these signs:
- Roots growing out of the drainage holes
- Roots circling around the inside of the pot
- Water draining through the pot almost immediately
- Soil drying out much faster than usual
- Slower growth despite proper care
- Smaller new leaves
- The plant becoming top-heavy and unstable
If you gently slide the root ball from the pot and see thick roots wrapped tightly around one another with very little soil remaining, it's time for a larger home.
Best Time to Repot
The ideal time to repot a Monstera is spring or early summer, just before or during its most active growing season.
At this time, the plant can quickly establish new roots and recover from the temporary stress of being moved.
Avoid repotting during winter whenever possible. Since growth naturally slows, the plant takes much longer to recover, increasing the risk of transplant shock and overly wet soil.
If you've recently purchased a healthy Monstera, there's usually no need to repot it immediately unless it's severely root-bound or growing in poor-quality soil.
Choosing the Right Pot Size
One of the most common mistakes is choosing a pot that's far too large.
It may seem logical to give your Monstera lots of extra space, but oversized pots hold significantly more wet soil than the roots can use. That excess moisture often stays damp for too long, increasing the risk of root rot.
Instead, choose a container that's only 1 to 2 inches (2.5 to 5 cm) wider than the current pot.
This provides enough room for steady root growth while allowing the soil to dry at a healthy rate between waterings.
Always make sure the new pot has drainage holes. No matter how good your watering routine is, trapped water can quickly damage the roots.
Step-by-Step Repotting Process
Repotting is easier than many people expect when done carefully.
Step 1: Water your Monstera lightly a day before repotting. Slightly moist soil holds together better than completely dry soil.
Step 2: Prepare the new pot with a small layer of fresh, chunky aroid soil at the bottom.
Step 3: Gently remove the plant from its current pot by supporting the base of the stem and easing the root ball free.
Step 4: Inspect the roots. Healthy roots are firm and white, cream, or light tan. Trim away any soft, black, or mushy roots using sterilized pruning shears.
Step 5: Loosen tightly circling roots with your fingers if necessary, but avoid excessive pulling or tearing.
Step 6: Position the plant in the new pot so it sits at the same depth as before.
Step 7: Fill around the root ball with fresh soil, lightly pressing it into place without compacting it too firmly.
Step 8: Water thoroughly until excess water drains from the bottom of the pot.
If you're adding a moss pole, this is the perfect time to install it before the roots become established.
Aftercare Tips
Your Monstera may look slightly droopy for a few days after repotting. This is completely normal.
Help it recover by:
- Keeping it in bright indirect light.
- Avoiding direct afternoon sun.
- Watering only when the top few inches of soil become dry.
- Waiting two to four weeks before fertilizing again.
- Avoiding unnecessary pruning during the recovery period.
Most healthy Monsteras bounce back quickly and often produce vigorous new growth within several weeks.
How Often Should You Repot?
Young, fast-growing Monsteras usually benefit from repotting every one to two years.
As the plant matures and growth slows, repotting every two to three years is often sufficient.
Rather than following a strict schedule, let your plant tell you when it's ready. A healthy Monstera that's still growing well and has room for its roots doesn't need to be disturbed simply because another year has passed.
Repotting Is an Opportunity, Not Just a Chore
Think of repotting as giving your Monstera a fresh start. New soil provides renewed nutrients, better drainage, and more space for roots to expand. It's also the perfect opportunity to inspect the health of the root system, refresh old potting mix, install climbing support, and set the stage for another season of impressive growth.
Done at the right time and with the right technique, repotting is one of the most valuable investments you can make in your Monstera's long-term health. The reward is a stronger root system, faster growth, and the large, vibrant leaves that make this tropical favorite such a showstopper.
How to Prune a Monstera Without Hurting It
Pruning can feel intimidating, especially when your Monstera has finally started producing those beautiful split leaves you've been waiting for. The thought of cutting into a healthy plant is enough to make many owners hesitate. Fortunately, Monsteras are remarkably resilient, and when pruned correctly, they often come back stronger than before.
Pruning isn't just about keeping your plant looking tidy. It's an important part of long-term care that helps remove damaged growth, improve airflow, encourage healthier development, and keep an oversized Monstera manageable inside your home.
The key is knowing what to cut, when to cut it, and when it's best to leave the plant alone.
Removing Damaged Leaves
The most common reason to prune a Monstera is to remove leaves that are no longer benefiting the plant.
Old leaves that have turned completely yellow, become badly damaged, or developed large brown patches will never return to their healthy green color. Instead of leaving the plant to direct energy toward dying foliage, removing these leaves allows it to focus on producing fresh growth.
When pruning:
- Use clean, sharp pruning shears or scissors.
- Cut the leaf stem close to the main vine without damaging it.
- Avoid tearing or twisting leaves away by hand.
- Dispose of diseased leaves rather than composting them.
Occasionally removing older leaves is a normal part of Monstera care and doesn't harm the plant.
Encouraging Bushier Growth
Unlike some houseplants, Monsteras naturally grow as climbing vines rather than dense bushes.
Pruning won't necessarily make them branch extensively, but strategic trimming can encourage fuller growth by stimulating dormant growth points near the cut.
If your Monstera has become too tall or leggy, shorten the vine by cutting just above a healthy node, the small bump where leaves and aerial roots emerge.
The removed section can often be propagated, allowing you to create a new plant instead of discarding the cutting.
Over time, careful pruning also helps maintain a more balanced shape, especially for indoor plants growing in limited space.
What About Aerial Roots?
Aerial roots are one of the features that make Monsteras unique, and one of the most misunderstood.
These thick roots naturally emerge from the stem as the plant climbs. In the wild, they anchor the Monstera to tree trunks and absorb moisture from the humid rainforest environment.
Many people wonder whether they should cut them off for cosmetic reasons.
The short answer is: it's usually better not to.
Healthy aerial roots contribute to the plant's natural growth habit and can be guided into a moss pole or back into the potting soil, where they often continue supporting the plant.
If an aerial root has become damaged or is creating a practical problem, trimming it won't usually harm the plant. However, removing all aerial roots simply for appearance offers no benefit and may reduce the plant's climbing ability.
Always Sanitize Your Tools
One of the easiest ways to spread disease between houseplants is by using dirty tools.
Before pruning, disinfect your scissors or pruning shears with rubbing alcohol or a diluted bleach solution. Repeat the process if you're removing diseased material before moving on to healthy parts of the plant.
Sharp, sanitized tools create clean cuts that heal faster and reduce the risk of infection.
Common Pruning Mistakes
Even though Monsteras tolerate pruning well, a few common mistakes can slow recovery.
Avoid:
- Removing too many healthy leaves at once.
- Cutting through the main stem without a clear purpose.
- Using dull or dirty tools.
- Pruning immediately after repotting.
- Pruning heavily during winter when growth has slowed.
- Removing every aerial root for appearance.
A good rule of thumb is to avoid removing more than 25 to 30 percent of the plant's healthy foliage during a single pruning session. This allows your Monstera to recover without unnecessary stress.
When Is the Best Time to Prune?
The ideal time to prune is during spring and early summer, when your Monstera is actively growing.
At this stage, the plant heals more quickly and has plenty of energy to produce fresh growth.
Small maintenance cuts, such as removing a damaged leaf, can be made at any time of year. However, major reshaping is best saved for the growing season.
Pruning Can Make Your Monstera Even Better
Many people avoid pruning because they worry they'll slow their plant's growth. In reality, thoughtful pruning often has the opposite effect.
By removing damaged foliage, improving airflow, controlling size, and encouraging healthy new growth, pruning helps your Monstera direct its energy where it matters most.
Combined with proper lighting, watering, fertilizing, and climbing support, occasional pruning is one more step toward growing the kind of lush, vibrant Monstera that becomes the focal point of any room.
How to Propagate Monstera Successfully
One of the most rewarding things about owning a Monstera is that you can turn one healthy plant into several. Whether you want to expand your indoor jungle, fill another room with tropical greenery, or share cuttings with friends and family, propagation is an easy and satisfying way to grow new Monsteras without buying another plant.
The secret to successful propagation is making your cut in the right place. As long as your cutting includes a healthy node, the point on the stem where leaves and aerial roots emerge, it has the potential to develop its own root system and become an independent plant.
With a little patience and the right conditions, you'll soon have a thriving new Monstera ready for its own pot.
Propagating in Water
Water propagation is the most popular method because it's simple and lets you watch new roots develop.
Start by selecting a healthy vine with at least one leaf and one visible node. Using sterilized pruning shears, make a clean cut just below the node. If the cutting already has an aerial root, even better, this often speeds up the rooting process.
Place the cutting in a clean glass or jar filled with room-temperature water, making sure the node is submerged while keeping the leaves above the waterline.
For the best results:
- Place the jar in bright indirect light.
- Change the water every five to seven days.
- Rinse the container regularly to prevent algae and bacteria buildup.
- Avoid placing the cutting in direct sunlight, which can overheat the water.
Under ideal conditions, small roots often begin appearing within two to four weeks, though some cuttings may take longer depending on the season and growing conditions.
Propagating in Soil
If you'd rather skip the transition from water to soil, you can root your cutting directly in a well-draining aroid mix.
Prepare a small pot filled with lightly moist, chunky soil. Insert the node below the soil surface while leaving the leaf exposed.
Keep the soil evenly moist, but never soggy, during the rooting process. Placing a clear plastic bag loosely over the pot can help increase humidity, though it's important to allow some airflow to prevent mold.
Rooting in soil generally takes a little longer to confirm because the roots aren't visible, but once new leaves begin emerging, you'll know the cutting has successfully established itself.
Where to Cut
The most important part of propagation is identifying the correct cutting point.
A node is the swollen section of stem where leaves, aerial roots, or growth points emerge. Without a node, a Monstera cutting cannot produce new roots.
When preparing your cutting:
- Cut about ½ to 1 inch (1 to 2.5 cm) below the node.
- Include at least one healthy leaf.
- Choose a stem free of disease or pest damage.
- If possible, select a cutting with an aerial root already forming.
Avoid cutting random leaf stems without nodes. While they may stay green in water for a while, they won't develop into a new plant.
Rooting Timeline
Propagation requires patience more than anything else.
Although every cutting grows at its own pace, a typical timeline looks like this:
Week 1–2: The cutting adjusts to its new environment.
Week 2–4: Small white roots often begin to emerge from the node.
Week 4–8: The root system becomes stronger and more extensive.
Week 6–10: Many cuttings begin producing fresh leaves once roots are well established.
Cool temperatures, low light, or winter conditions can slow this process, so don't be discouraged if your cutting takes a little longer.
Transplanting New Plants
For water-propagated cuttings, it's generally best to wait until the roots reach about 2 to 4 inches (5 to 10 cm) long before moving them into soil.
Choose a small pot with drainage holes and fill it with a chunky aroid mix similar to the one used for mature Monsteras.
After planting:
- Water thoroughly.
- Keep the soil lightly moist for the first couple of weeks.
- Place the new plant in bright indirect light.
- Avoid fertilizing immediately; wait until you see signs of active new growth.
Some slight drooping after transplanting is normal as the roots adapt from water to soil.
Common Propagation Mistakes
Even though Monsteras are relatively easy to propagate, a few mistakes can reduce your chances of success.
Avoid:
- Taking cuttings without a node.
- Using dirty pruning tools.
- Leaving leaves submerged in water.
- Allowing water to become stagnant.
- Placing cuttings in harsh direct sunlight.
- Moving cuttings to soil before the roots are well developed.
Patience is just as important as proper technique. Rushing the process often leads to weaker plants.
A New Plant from One Simple Cutting
Propagation is one of the reasons Monsteras have become such beloved houseplants. With just a healthy stem, a clean cut, and a little time, you can grow an entirely new plant that carries the same beauty as the original.
Whether you're creating gifts, filling your home with more greenery, or simply enjoying the process of watching new roots emerge, propagating your Monstera is both practical and incredibly rewarding. It's a reminder that healthy plants don't just grow, they multiply.
Common Monstera Problems and How to Fix Them
Even the healthiest Monsteras run into problems from time to time. A yellow leaf, a drooping stem, or a plant that suddenly stops growing doesn't necessarily mean it's dying. In most cases, your Monstera is simply responding to changes in its environment and giving you clues about what it needs.
The key is learning to read those signals early. Most common Monstera issues are easy to correct once you identify the underlying cause, and acting quickly can prevent minor problems from becoming major ones.
Below are the most common Monstera problems, what causes them, and how to get your plant back on track.
Yellow Leaves
Yellow leaves are one of the most frequent concerns among Monstera owners, but not every yellow leaf is a cause for alarm.
If an older leaf near the base of the plant gradually turns yellow before falling off, it's often just part of the plant's natural aging process.
However, widespread or rapidly developing yellow leaves usually point to a care issue.
Possible causes include:
- Overwatering
- Poor drainage
- Root rot
- Nutrient deficiencies
- Insufficient light
- Sudden environmental changes
How to fix it:
- Check the soil before watering again.
- Improve drainage if the soil remains wet for long periods.
- Move the plant to brighter indirect light.
- Inspect the roots if overwatering is suspected.
- Remove completely yellow leaves once they have finished declining.
Brown Leaf Tips
Brown tips are another common issue and usually indicate that the plant is experiencing some form of stress rather than disease.
Possible causes include:
- Low humidity
- Inconsistent watering
- Excess fertilizer
- Mineral buildup from hard water
- Dry indoor air
How to fix it:
- Increase humidity if the air is very dry.
- Water consistently instead of allowing the soil to become extremely dry.
- Flush the soil occasionally to remove excess fertilizer salts.
- Consider switching to filtered or rainwater if mineral buildup is severe.
Small brown tips won't turn green again, but correcting the cause will help future leaves emerge healthy.
Curling Leaves
Leaves that curl inward are often the plant's way of reducing moisture loss.
Possible causes include:
- Underwatering
- Extremely low humidity
- Heat stress
- Root damage
- Cold drafts
How to fix it:
- Check soil moisture immediately.
- Water thoroughly if the soil is dry.
- Keep the plant away from heating vents and air conditioners.
- Maintain stable indoor temperatures.
- Increase humidity if necessary.
Healthy leaves often return to normal once the plant's water balance is restored.
Drooping Stems
A drooping Monstera can look dramatic, but the cause isn't always serious.
Possible causes include:
- Recently watered or recently repotted plants adjusting
- Underwatering
- Overwatering
- Lack of climbing support
- Weak stems caused by insufficient light
How to fix it:
- Check soil moisture before watering.
- Add a moss pole if the plant has become heavy.
- Improve lighting conditions.
- Inspect the roots if the plant remains limp despite proper watering.
Newly repotted Monsteras often recover within several days as their roots settle into fresh soil.
No Fenestrations
One of the biggest disappointments for new Monstera owners is waiting months, or even years, for those famous split leaves to appear.
Young Monsteras naturally produce solid leaves before developing fenestrations as they mature. However, if an older plant still isn't producing splits, environmental conditions are often responsible.
Possible causes include:
- Insufficient light
- Lack of climbing support
- Immature plant
- Poor nutrition
- Slow overall growth
How to fix it:
- Move the plant to brighter indirect light.
- Install a moss pole.
- Fertilize during the growing season.
- Be patient, fenestrations become more pronounced as the plant matures.
Consistency is far more important than quick fixes.
Slow Growth
Monsteras are generally vigorous growers, especially during spring and summer. If your plant hasn't produced a new leaf in months, something may be limiting its growth.
Possible causes include:
- Low light
- Root-bound conditions
- Nutrient deficiencies
- Winter dormancy
- Low temperatures
How to fix it:
- Increase light exposure.
- Repot if the roots have filled the container.
- Resume fertilizing during active growth.
- Keep temperatures within the ideal range of 65°F to 85°F (18°C to 29°C).
- Remember that little or no growth during winter is completely normal.
Troubleshooting Checklist
When your Monstera doesn't look its best, work through this checklist before making major changes:
- Is the soil staying wet for too long?
- Is the plant receiving enough bright indirect light?
- Does the pot have proper drainage?
- Has the humidity dropped significantly?
- Is the plant root-bound?
- Have you fertilized appropriately during the growing season?
- Are there any signs of pests?
Answering these questions often reveals the problem faster than guessing.
Healthy Monsteras Communicate Through Their Leaves
One of the best things about growing Monsteras is that they're excellent communicators. Their leaves quickly reflect changes in their environment, giving you an opportunity to correct problems before permanent damage occurs.
Rather than reacting to every yellow leaf or brown tip with panic, think of these changes as feedback. With careful observation and small adjustments to your care routine, most Monsteras recover remarkably well and continue producing the lush, dramatic foliage that has made them one of the world's favorite houseplants.
Common Pests That Attack Monsteras
A healthy Monstera is surprisingly resilient, but even the strongest plants can occasionally become a target for unwanted visitors. Pests are one of the most common reasons indoor plants suddenly develop yellow leaves, distorted new growth, sticky residue, or mysterious spots that seem to appear overnight.
The good news is that most Monstera pests are manageable if you catch them early. Regular inspections and quick action can usually stop a small infestation before it spreads to the rest of your indoor plants.
Make it a habit to check the tops and undersides of leaves, stems, aerial roots, and the surface of the soil every week. Early detection is your best defense.
Spider Mites
Spider mites are tiny pests that are almost impossible to see with the naked eye, but the damage they leave behind is much easier to spot.
These pests feed by piercing the leaves and sucking out plant juices, gradually weakening the plant.
Signs of spider mites include:
- Tiny yellow or white speckles across the leaves
- Fine webbing between stems and leaves
- Dull, faded foliage
- Premature leaf drop during severe infestations
Spider mites thrive in warm, dry conditions, making them especially common during winter when indoor heating lowers humidity.
How to treat them:
- Isolate the affected plant.
- Rinse the leaves with lukewarm water.
- Wipe both sides of each leaf with insecticidal soap or neem oil.
- Repeat treatments every 5 to 7 days until no signs remain.
- Increase humidity to make conditions less favorable for mites.
Mealybugs
Mealybugs are soft-bodied insects covered in a white, cotton-like wax that makes them easy to recognize.
They often hide where leaf stems meet the main vine or beneath new leaves, feeding on plant sap and slowing growth.
Common symptoms include:
- White cottony clusters
- Sticky honeydew residue
- Yellowing leaves
- Stunted new growth
How to treat them:
- Remove individual insects with a cotton swab dipped in rubbing alcohol.
- Spray the plant with insecticidal soap if the infestation is widespread.
- Continue checking weekly because eggs can hatch after the initial treatment.
Prompt treatment usually prevents mealybugs from becoming a major problem.
Scale
Scale insects often resemble small brown bumps attached firmly to stems and leaves. Because they don't move much, many people mistake them for part of the plant itself.
Like mealybugs, scale insects feed on sap and leave behind sticky honeydew that can encourage black sooty mold.
Signs include:
- Hard brown or tan bumps
- Sticky leaves
- Yellowing foliage
- Weak overall growth
Treatment:
- Gently scrape off visible insects using your fingernail or a soft cloth.
- Wipe affected areas with rubbing alcohol.
- Apply horticultural oil or insecticidal soap according to the product instructions.
- Repeat treatments as needed to eliminate newly hatched insects.
Thrips
Thrips are tiny, slender insects that can cause significant cosmetic damage, particularly to new growth.
They feed by scraping the leaf surface and sucking out plant cells.
Symptoms include:
- Silvery streaks on leaves
- Distorted or twisted new leaves
- Tiny black specks of waste
- Brown patches that expand over time
Thrips reproduce quickly, so immediate treatment is essential.
How to control them:
- Isolate the affected Monstera.
- Remove heavily damaged leaves if necessary.
- Spray with insecticidal soap or neem oil.
- Use yellow or blue sticky traps to monitor adult insects.
- Repeat treatment weekly until no new damage appears.
Fungus Gnats
Unlike the other pests on this list, adult fungus gnats rarely damage the plant directly. Instead, they're usually a sign that the soil is staying too wet.
The tiny black flies lay eggs in moist soil, and their larvae feed on decaying organic matter and occasionally young roots.
Signs include:
- Small black flies around the pot
- Constantly wet soil
- Slower growth in young plants
- Tiny larvae visible near the soil surface
How to eliminate them:
- Allow the soil to dry more between waterings.
- Remove fallen leaves and organic debris.
- Use yellow sticky traps to catch adults.
- Consider beneficial nematodes or biological larvicides for persistent infestations.
Reducing excess moisture is usually the most effective long-term solution.
Natural and Chemical Treatments
Many pest problems can be solved without resorting to harsh chemicals.
Some of the most effective treatments include:
- Neem oil: Helps control a wide range of soft-bodied insects while discouraging future infestations.
- Insecticidal soap: Safe for most houseplants and highly effective against spider mites, mealybugs, aphids, and thrips.
- Rubbing alcohol: Excellent for removing individual mealybugs and scale insects.
- Horticultural oil: Smothers many pests by coating their bodies.
- Sticky traps: Useful for monitoring flying pests such as fungus gnats and adult thrips.
For severe infestations that don't respond to repeated treatment, a systemic insecticide labeled for indoor ornamental plants may be appropriate. Always follow the manufacturer's directions carefully and keep treated plants away from children and pets until it's safe to return them.
Prevention Is Easier Than Treatment
The healthiest Monsteras are usually the least attractive to pests. A strong plant growing in proper light, well-draining soil, and consistent conditions is naturally better equipped to withstand occasional insect attacks.
To reduce the risk of future infestations:
- Inspect new plants before bringing them indoors.
- Quarantine new houseplants for two to three weeks.
- Wipe dust from leaves regularly.
- Avoid overwatering.
- Improve airflow around your plants.
- Check foliage weekly for early warning signs.
A few minutes of routine inspection can save hours of treatment later.
A Healthy Monstera Is Your Best Defense
Pests are an unfortunate reality of indoor gardening, but they don't have to become a disaster. Most infestations are entirely manageable when detected early, and Monsteras are remarkably resilient once the problem is addressed.
By making regular inspections part of your care routine and responding quickly at the first sign of trouble, you'll keep your Monstera healthy, vibrant, and focused on what it does best, producing breathtaking tropical foliage year after year.
Why Your Monstera Isn't Producing Split Leaves
For many plant lovers, the dream of owning a Monstera revolves around one iconic feature: its dramatic split leaves. Those natural holes and deep cuts, known as fenestrations, are what transformed this tropical plant into an indoor gardening superstar.
So when your Monstera continues producing solid, heart-shaped leaves month after month, it's easy to assume something is wrong.
The truth is, a lack of split leaves is usually the result of one or more growing conditions rather than a serious problem. Understanding what triggers fenestrations will help you create the environment your Monstera needs to mature naturally.
Age and Maturity
The first thing to remember is that young Monsteras simply don't produce fenestrations.
Seedlings and juvenile plants naturally grow small, solid leaves. As the plant matures and gains enough energy, each new leaf becomes larger and more complex until the characteristic splits and holes begin to appear.
Depending on the age of the plant and its growing conditions, this process can take anywhere from several months to a few years.
Patience is often the biggest requirement.
If your Monstera is still relatively young, solid leaves are completely normal and shouldn't be viewed as a sign of poor health.
Light Deficiencies
Insufficient light is one of the most common reasons mature Monsteras fail to develop fenestrations.
Producing large, deeply divided leaves requires a significant amount of energy. When light levels are too low, the plant conserves resources by producing smaller, simpler leaves that require less energy to grow.
Signs that light may be limiting your Monstera include:
- Small new leaves
- Long gaps between leaves
- Leaning toward the nearest window
- Slow overall growth
- Pale green foliage
Moving the plant to a location with bright indirect light often results in noticeable improvements over the next several new leaves.
Remember that existing leaves won't suddenly develop splits, only future leaves can.
Lack of Climbing Support
In the rainforest, Monsteras climb trees as they mature.
As they grow higher toward brighter light, their leaves become progressively larger and develop more dramatic fenestrations.
When grown indoors without a moss pole or other support, Monsteras often continue producing juvenile-style growth for much longer than necessary.
Adding a sturdy moss pole encourages the plant to behave more like it would in nature.
Over time, many growers notice:
- Larger leaves
- More splits
- More interior holes
- Stronger stems
- Shorter spacing between leaves
Support alone won't create fenestrations, but when combined with proper lighting, it can make a dramatic difference.
Nutrient Deficiencies
Monstereras require a steady supply of nutrients to produce vigorous growth.
If your plant has exhausted the nutrients in its potting mix or hasn't been fertilized during the growing season, it may lack the energy needed to produce large mature leaves.
Nitrogen supports lush foliage, while phosphorus and potassium strengthen roots and overall plant health.
A balanced fertilizer applied during spring and summer helps ensure your Monstera has the resources it needs to reach maturity.
However, remember that fertilizer enhances healthy growth, it cannot compensate for poor lighting or overwatering.
Environmental Stress
Plants experiencing ongoing stress often prioritize survival over producing large decorative leaves.
Stress can come from many sources, including:
- Inconsistent watering
- Low humidity
- Extreme temperatures
- Root-bound conditions
- Pest infestations
- Frequent relocation around the home
- Poor soil drainage
Even if each issue seems minor on its own, together they can significantly slow development.
The more stable your Monstera's environment becomes, the more energy it can devote to producing mature foliage.
Don't Judge the Plant by One Leaf
It's important to remember that each new leaf reflects the conditions the plant experienced weeks before it unfurled.
If you've recently improved lighting, installed a moss pole, or adjusted your watering routine, you probably won't see dramatic changes immediately.
Instead, watch each successive leaf.
It's common to see:
- Slightly larger leaves first
- Then shallow splits
- Then deeper cuts
- Finally, the large interior holes associated with fully mature Monsteras
Fenestrations develop gradually rather than appearing all at once.
The Formula for Bigger, Split Leaves
If you're aiming for those breathtaking jungle-style leaves, focus on providing everything your Monstera needs consistently:
- Bright indirect light every day
- A moss pole or sturdy climbing support
- Well-draining, chunky soil
- Proper watering habits
- Moderate to high humidity
- Regular fertilizing during the growing season
- Plenty of patience
Monsteras don't produce spectacular leaves because of one magic trick. They do it because all the pieces come together over time.
Trust the Process
Every mature Monstera with enormous, beautifully split leaves started exactly where yours is now, with simple juvenile foliage.
The difference isn't luck. It's months or years of consistent care.
Instead of chasing instant results, focus on creating the right environment day after day. As your plant matures and gains strength, those iconic fenestrations will begin appearing naturally, with each new leaf becoming more impressive than the last.
When they finally arrive, you'll know your Monstera isn't just surviving, it's thriving.
Seasonal Monstera Care Checklist
One of the biggest secrets to growing a thriving Monstera is recognizing that its needs change throughout the year. Just like plants in nature respond to shifting seasons, your indoor Monstera also experiences periods of active growth and slower rest.
Adjusting your care routine to match the seasons helps prevent common problems such as overwatering in winter, nutrient deficiencies during summer, or slow growth caused by changing light levels. Rather than treating your Monstera the same every month, use this seasonal checklist to keep it healthy all year long.
Spring: Wake Up the Growing Season
Spring marks the beginning of your Monstera's most active growth period. As daylight hours increase and temperatures become warmer, the plant starts producing new roots, larger leaves, and stronger stems.
This is the perfect time to refresh your care routine.
Spring Checklist:
- Resume regular fertilizing every four to six weeks.
- Increase watering as the soil begins drying more quickly.
- Check whether your plant needs repotting.
- Install or extend a moss pole before vigorous growth begins.
- Prune away damaged or yellow leaves.
- Inspect for pests that may have survived the winter.
- Rotate the pot every couple of weeks for even growth.
- Wipe dust from leaves to maximize light absorption.
Spring is also one of the best times to propagate healthy stem cuttings since they'll establish roots quickly during the active growing season.
Summer: Maximize Growth
Summer is when Monsteras typically perform at their best.
With long daylight hours, warm temperatures, and consistent care, many plants produce their largest leaves of the year. Water use also increases, so you'll likely find yourself checking soil moisture more frequently.
Summer Checklist:
- Continue fertilizing every four to six weeks.
- Water thoroughly whenever the top few inches of soil become dry.
- Monitor humidity during hot weather.
- Keep the plant out of harsh afternoon sun.
- Continue training vines onto the moss pole.
- Inspect weekly for spider mites, thrips, and other common pests.
- Remove any damaged leaves as needed.
Healthy Monsteras often produce multiple new leaves throughout the summer, making this the most rewarding season for plant owners.
Fall: Slow Things Down
As autumn arrives, growth gradually begins to slow. Shorter days mean your Monstera receives less light, so it naturally requires fewer nutrients and less water.
Rather than following your summer routine, begin easing into a lighter maintenance schedule.
Fall Checklist:
- Reduce watering frequency as soil dries more slowly.
- Fertilize less often or stop if growth has significantly slowed.
- Continue checking for pests before indoor heating begins.
- Rotate the plant if it's leaning toward weaker sunlight.
- Clean leaves to help maximize available light.
- Avoid unnecessary repotting unless absolutely needed.
This is a good time to observe your Monstera and prepare for the slower winter months ahead.
Winter: Rest and Recovery
Winter is usually the quietest season for indoor Monsteras.
Lower light levels and cooler conditions mean the plant enters a period of slower growth. This isn't a sign that something is wrong, it's simply conserving energy until spring returns.
The biggest mistake many owners make during winter is continuing to water and fertilize as if the plant were still growing rapidly.
Winter Checklist:
- Water only after checking that the top few inches of soil are dry.
- Stop fertilizing unless the plant is actively producing new growth.
- Move the plant closer to a bright window if necessary.
- Protect it from cold drafts and sudden temperature changes.
- Increase humidity if indoor heating dries out the air.
- Continue inspecting for pests, especially spider mites.
- Avoid heavy pruning and repotting during this period.
Patience is important during winter. Some Monsteras may not produce a single new leaf for several weeks, and that's completely normal.
Seasonal Care at a Glance
Season | Watering | Fertilizer | Growth | Main Focus |
Spring | Increase gradually | Every 4–6 weeks | Fast | Repot, prune, fertilize, propagate |
Summer | Water more frequently | Every 4–6 weeks | Fastest | Support climbing, monitor pests, maintain humidity |
Fall | Reduce gradually | Reduce or stop | Slowing | Prepare for dormancy, clean leaves |
Winter | Water sparingly | Usually none | Slow or dormant | Protect from cold, increase light, avoid overwatering |
Work With Nature, Not Against It
Your Monstera doesn't expect the same conditions every month of the year, and neither should your care routine.
By paying attention to seasonal changes and making small adjustments as the year progresses, you'll reduce stress on the plant and create the stable environment it needs to thrive. Over time, these simple habits lead to healthier roots, stronger stems, larger leaves, and steady growth season after season.
The best Monstera care isn't about following a rigid schedule, it's about responding to your plant's changing needs throughout the year.
Monstera Care Mistakes That Kill Plants
Monsteras have earned a reputation for being easy-care houseplants, and for the most part, they deserve it. They're adaptable, resilient, and forgiving of the occasional missed watering or imperfect growing condition.
However, "easy to care for" doesn't mean "impossible to kill."
In fact, most struggling Monsteras aren't suffering because of neglect, they're suffering because of well-intentioned care mistakes. Many owners unknowingly do too much instead of too little, creating conditions that slowly weaken the plant over time.
The good news is that once you're aware of these common mistakes, they're easy to avoid.
Watering on a Schedule Instead of Checking the Soil
Perhaps the biggest mistake Monstera owners make is watering every Saturday, every Sunday, or every two weeks simply because it's on the calendar.
Your plant doesn't care what day it is.
Its water needs change depending on:
- Temperature
- Humidity
- Light levels
- Pot size
- Soil type
- Time of year
Instead of following a fixed schedule, always check the soil first. If the top 2 to 3 inches (5 to 7 cm) feel dry, it's probably time to water. If they're still damp, wait a few more days.
Listening to your plant instead of your calendar is one of the best habits you can develop.
Using Heavy, Compact Soil
A Monstera's roots need oxygen just as much as they need water.
Dense potting soil traps moisture for too long, limiting airflow and dramatically increasing the risk of root rot.
Healthy Monsteras thrive in loose, chunky aroid mixes containing ingredients like orchid bark, perlite, pumice, and coco coir. These materials allow excess water to drain quickly while still retaining enough moisture for healthy growth.
If your soil feels muddy, sticky, or compacted, it may be time for a refresh.
Keeping It in a Dark Corner
Monsteras are often advertised as low-light plants, but this claim is frequently misunderstood.
While they can survive in lower light, they won't truly thrive there.
Insufficient light often results in:
- Smaller leaves
- Slower growth
- Long, stretched stems
- Weak growth
- Little or no fenestration
For the lush, dramatic appearance that makes Monsteras so popular, bright indirect light is essential.
Ignoring Humidity
Although Monsteras tolerate average household humidity better than many tropical plants, extremely dry air can still take its toll.
Ignoring humidity altogether may lead to:
- Brown leaf tips
- Dry edges
- Stuck or damaged new leaves
- Slower growth
You don't need rainforest conditions, but maintaining humidity around 60% whenever possible helps your Monstera perform at its best.
Repotting Too Frequently
Many people assume that giving their Monstera a larger pot every year automatically encourages faster growth.
In reality, unnecessary repotting often causes more harm than good.
Oversized pots retain extra moisture that roots can't use, increasing the risk of root rot.
Monsteras actually prefer being slightly root-bound. Repot only when the roots have clearly outgrown their current container.
Overfertilizing
When growth slows, it's tempting to reach for more fertilizer.
Unfortunately, excessive feeding usually has the opposite effect.
Too much fertilizer can cause:
- Burned roots
- Brown leaf tips
- Salt buildup
- Yellowing leaves
- Stunted growth
Remember:
Fertilizer supports healthy growth, it doesn't create it.
Bright light, proper watering, and healthy soil always come first.
Using Pots Without Drainage Holes
Decorative pots without drainage holes may look beautiful, but they're one of the fastest ways to damage a Monstera.
Without somewhere for excess water to escape, moisture collects around the roots, depriving them of oxygen.
Always use a nursery pot or decorative container with proper drainage.
If you love a decorative pot that doesn't have holes, use it as an outer cachepot and keep your Monstera inside a removable plastic nursery pot.
Moving the Plant Too Often
Monsteras are surprisingly adaptable, but they also appreciate consistency.
Constantly moving your plant from room to room, or from one window to another every few days, forces it to continually adjust to new light levels, temperatures, and humidity.
Choose a location that provides bright indirect light and stable conditions, then allow your Monstera time to settle in.
Neglecting the Leaves
Large Monstera leaves naturally collect dust over time.
That layer of dust may seem harmless, but it reduces the plant's ability to absorb sunlight efficiently.
Every few weeks, wipe both sides of the leaves gently with a soft, damp cloth.
Not only will your Monstera look better, but it will also photosynthesize more effectively.
Forgetting to Inspect for Pests
Pest infestations rarely happen overnight.
Spider mites, mealybugs, scale insects, and thrips usually begin with just a few insects before multiplying rapidly.
Taking just a minute each week to inspect the undersides of leaves and stems can help you catch problems long before they become serious.
Early detection is almost always easier than treatment.
Chasing Perfection
Perhaps the biggest mistake of all is expecting perfection.
Every Monstera develops an occasional yellow leaf. Every grower makes watering mistakes from time to time. Even experienced plant enthusiasts occasionally deal with pests or damaged foliage.
A healthy Monstera isn't flawless, it's resilient.
Focus on providing consistent care rather than trying to create perfect conditions every single day.
Great Monsteras Are Built on Consistency
Monsteras don't become spectacular overnight. They become spectacular because small, good decisions are repeated over months and years.
Provide bright indirect light, water thoughtfully, use well-draining soil, fertilize in moderation, support the plant as it climbs, and pay attention to the signals it gives you.
Avoid the common mistakes covered in this guide, and you'll be well on your way to growing a Monstera with lush, oversized leaves that continues to impress year after year.
Frequently Asked Questions
Even after learning the fundamentals of Monstera care, it's normal to have a few lingering questions. Below are answers to some of the most common questions plant owners ask about growing healthy, vibrant Monsteras.
How Fast Do Monsteras Grow?
Monsteras are considered moderate to fast-growing houseplants when they're provided with the right conditions. During the growing season, typically spring and summer, a healthy Monstera can produce a new leaf every four to six weeks, and sometimes even more frequently in ideal environments.
Growth speed depends on several factors, including:
- Bright indirect light
- Warm temperatures
- Well-draining soil
- Regular watering
- Proper fertilization
- Adequate humidity
Young plants usually grow more quickly than mature ones because they're focused on establishing roots and expanding their foliage.
Why Are My Monstera Leaves Turning Yellow?
Yellow leaves are most often caused by overwatering, but they can also result from underwatering, poor drainage, low light, nutrient deficiencies, or natural aging.
If only one older leaf near the base of the plant turns yellow occasionally, it's usually part of the normal life cycle.
However, if multiple leaves begin yellowing at once, check:
- Soil moisture
- Drainage
- Root health
- Lighting conditions
- Recent changes to your care routine
Correcting the underlying issue early usually prevents additional leaves from being affected.
Can Monsteras Live in Low Light?
Yes, Monsteras can survive in lower light conditions, but they won't perform at their best.
Low light often leads to:
- Slower growth
- Smaller leaves
- Weak stems
- Longer gaps between leaves
- Little or no fenestration
For the healthiest growth, place your Monstera in bright indirect light where it receives plenty of natural illumination without prolonged exposure to harsh direct sunlight.
Should I Mist My Monstera?
Occasional misting won't usually harm your Monstera, but it isn't the most effective way to increase humidity.
The moisture from misting evaporates quickly and provides only temporary benefits.
A better long-term approach is to:
- Use a humidifier
- Group tropical plants together
- Maintain consistent watering
- Keep the plant away from drying heat sources
These methods create a more stable environment for healthy growth.
How Often Should I Repot My Monstera?
Most Monsteras need repotting every one to three years, depending on their age and growth rate.
Instead of following a strict schedule, look for signs such as:
- Roots growing through drainage holes
- Soil drying unusually quickly
- Slower growth
- Crowded roots
- The plant becoming unstable in its pot
Always move up only one pot size at a time to avoid keeping the soil wet for too long.
Why Doesn't My Monstera Have Holes?
Leaf splits and holes develop naturally as Monsteras mature.
If your plant isn't producing fenestrations, the most common reasons include:
- It's still too young.
- It isn't receiving enough light.
- It lacks climbing support.
- Growth has slowed due to poor growing conditions.
Improve the environment and be patient. Future leaves, not existing ones, will gradually develop larger splits as the plant matures.
Are Monsteras Toxic to Pets?
Yes.
Monsteras contain calcium oxalate crystals, which can irritate the mouths, tongues, and digestive systems of cats and dogs if chewed.
Symptoms may include:
- Drooling
- Mouth irritation
- Swelling
- Difficulty swallowing
- Vomiting
While serious poisoning is uncommon, it's best to keep Monsteras out of reach of curious pets and young children.
If you suspect your pet has eaten part of the plant and is showing symptoms, contact your veterinarian promptly.
Can I Grow a Monstera in Water Permanently?
Monsteras can survive in water for surprisingly long periods, especially during propagation, but they generally perform much better in soil over the long term.
Growing permanently in water requires:
- Frequent water changes
- Careful nutrient management
- Clean containers
- Ongoing monitoring for algae and root health
For most home growers, a chunky, well-draining soil mix provides a healthier and lower-maintenance environment.
Final Tip: Observe Your Plant
No guide can replace paying attention to your own Monstera.
Every home has different lighting, humidity, temperatures, and seasonal changes. Learning how your plant responds to its environment is the fastest way to become a confident plant owner.
If you regularly inspect your Monstera, adjust your care as needed, and avoid the common mistakes covered in this guide, you'll be rewarded with a thriving tropical plant that continues to produce larger, healthier, and more spectacular leaves year after year.
Final Thoughts
Growing a healthy Monstera isn't about luck, it's about understanding what this remarkable tropical plant needs to thrive. While its dramatic split leaves may make it look high-maintenance, the reality is that Monsteras are surprisingly forgiving once you provide the right foundation. Bright indirect light, well-draining soil, thoughtful watering, moderate humidity, and a little patience are all it takes to help your plant flourish.
Remember that every Monstera grows at its own pace. Some will produce new leaves every few weeks during the growing season, while others take a little longer to settle into their environment. Resist the urge to constantly change your care routine in search of instant results. Plants respond to consistency far better than frequent adjustments.
As your Monstera matures, you'll notice the rewards of that patience. New leaves become larger. Fenestrations become deeper and more dramatic. Stems grow stronger, aerial roots become more active, and your once-small houseplant gradually transforms into the lush tropical centerpiece you envisioned when you first brought it home.
Don't be discouraged by the occasional yellow leaf, brown tip, or slow-growing season. Even experienced plant owners encounter these challenges. What separates thriving Monsteras from struggling ones isn't perfection, it's recognizing problems early and making small, informed adjustments before they become serious.
Most importantly, enjoy the journey. Houseplants aren't just decorations; they're living, growing companions that change over time. Watching a tightly rolled leaf slowly unfurl into a massive, glossy masterpiece is one of the most rewarding experiences in indoor gardening, and every new leaf is a sign that your care is paying off.
Whether you're caring for your very first Monstera deliciosa or adding another rare variety to your collection, the principles remain the same: provide a stable environment, observe your plant regularly, and let nature do the rest.
With the tips in this guide, you're well equipped to grow a Monstera that's healthier, stronger, and more beautiful with every passing season. Before long, those iconic oversized leaves will be a lasting reminder that consistent care always delivers the best results.

Leave a comment
Your email address will not be published. Required fields are marked *